How to Edit a Screenshot on a Mac: Crop, Draw, Add Text and Hide Details
 By Sleekshot Team
12 min read
Short answer
Right after you press Shift + Command + 4, click the thumbnail in the bottom-right corner. Markup opens with Sketch, Shapes (arrows included), Text, Sign, Rotate and Crop, and Done saves the result. For a screenshot you saved earlier, open it in Preview and click Show Markup Toolbar; Tools > Adjust Size resizes it. Markup has no blur and no step numbers. The free Sleekshot for Mac adds both, and you edit on the frozen screen before the file is saved.
On this page
- Which Mac tool to use for each edit
- Edit a screenshot right after you take it (Markup)
- Edit a saved screenshot in Preview or Photos
- Edit before you save with Sleekshot for Mac
- Crop and resize a screenshot on a Mac
- How to draw on a screenshot on a Mac: arrows and shapes
- How to add text to a screenshot on a Mac
- How to highlight on a screenshot on a Mac
- Hide emails, passwords and other private info
- Number the steps
- Add a signature or logo
- Save the edited screenshot as PNG, JPEG or HEIC
To edit a screenshot on a Mac, click the thumbnail that slides into the bottom-right corner right after you press ⇧ + ⌘ + 4. A Markup window opens with Sketch, Shapes (arrows included), Text, Sign, Rotate and Crop. Click Done, and the edited screenshot is saved. If the thumbnail has already gone, double-click the file to open it in Preview and click Show Markup Toolbar. Preview also resizes images under Tools → Adjust Size.
For most quick fixes, Markup is enough. It has two gaps people run into: there's no blur, and in Preview your shapes become part of the image as soon as you save. If you add arrows and hide emails on screenshots every day, an app where you edit before saving takes fewer clicks. Menu names below match Apple's guides for macOS 27 Golden Gate, as of October 2026.
Which Mac tool to use for each edit
Markup, Preview and Photos come with macOS. Sleekshot for Mac is a free download from the Mac App Store.
| Edit | Markup (thumbnail) | Preview | Photos | Sleekshot for Mac |
|---|---|---|---|---|
| How you open it | Click the thumbnail | Double-click the file | Import, then Edit | ⌘ + ⇧ + 2, before saving |
| Crop | Crop tool | Rectangular Selection, then Crop | Crop, with preset ratios | Resize the selection |
| Exact size in pixels | No | Tools → Adjust Size | No | Type W × H or pick a preset |
| Arrows and shapes | Shapes menu | Shapes menu | Shapes in Markup | 7 arrow styles, boxes and ellipses in 7 styles |
| Typed text | Text tool | Text tool | Text in Markup | 6 text styles, 6 fonts, emoji |
| Highlight | Highlight shape (dims the rest) | Highlight shape | Highlight shape | See-through highlighter |
| Hide private info | Filled shape | Filled shape | Filled shape | Blur or filled shape |
| Step numbers 1, 2, 3 | No | No | No | Yes |
| Signature or logo | Sign | Sign | No | Text or logo on every capture |
| Old screenshots | No | Yes | Yes | No |
Edit a screenshot right after you take it (Markup)
The floating thumbnail is the quickest way into Markup. It appears for a few seconds after every screenshot, before the file is written.
- Press ⇧ + ⌘ + 4 and drag over an area, or press ⇧ + ⌘ + 3 for the whole screen.
- Click the thumbnail in the bottom-right corner. The Markup window opens.
- Pick a tool from the top bar: Sketch, Draw, Shapes, Text, Sign, Shape Style, Border Color, Fill Color, Text Style, Rotate or Crop. Draw only shows up on Macs with a Force Touch trackpad.
- Click Done. The screenshot is saved with your edits, on the desktop unless you picked another folder.
Made a mess? Revert removes all your changes so you can start over. Apple notes that once you close the Markup window, your changes can't be undone, so check the image before you click Done.
If no thumbnail appears, it's turned off. Press ⇧ + ⌘ + 5, open Options and select Show Floating Thumbnail. All the capture shortcuts are in our guide on how to screenshot on a Mac.
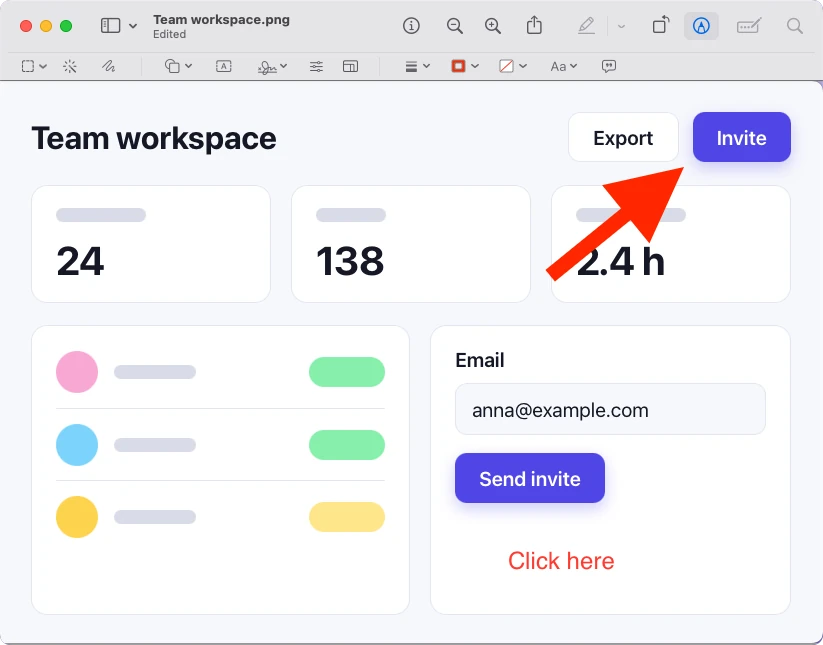
Edit a saved screenshot in Preview or Photos
Preview opens screenshots by default, and its Markup toolbar has everything from the thumbnail window plus a few image tools. Photos is better for cropping and fixing light and color.
Preview
- Double-click the screenshot. It opens in Preview.
- If you don't see the tools, click Show Markup Toolbar.
- Edit. Next to the usual Markup tools you get Adjust Color, Adjust Size and Instant Alpha, which makes a background color transparent.
- Press ⌘ + S to save, or use File → Export for a copy in another format.
Warning: Apple's Preview guide says that after you save an annotated image, you can't edit, move or delete the annotations. If you might want to change them later, choose File → Duplicate first and edit the copy.
You can skip Preview, too. Select the file in Finder, press the Space bar for Quick Look and click the Markup button.
Photos
Photos only edits pictures in its library, so drag the screenshot into Photos or use File → Import first. Double-click it and click Edit. You can crop with preset ratios, straighten the image and adjust light and color. Photos keeps the original, so Image → Revert to Original undoes everything. For arrows and text, click the Extensions button and choose Markup.
Edit before you save with Sleekshot for Mac
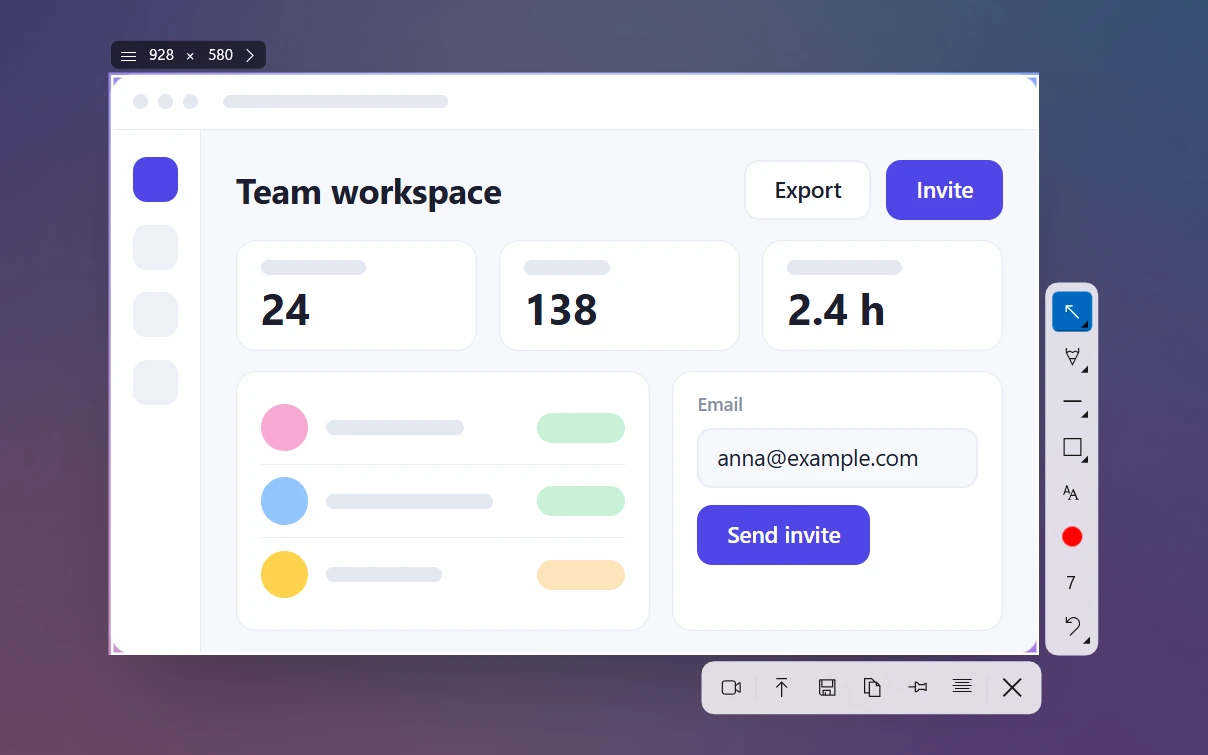
Sleekshot for Mac is a free menu bar app for screenshots and screen recording (Mac App Store; screenshots on macOS 12 or later, recording on macOS 13 Ventura or later). It works the other way round from Markup. The screen freezes, you select an area and draw on it in place, and a file only appears when you copy or save. We make Sleekshot, so take the recommendation with that in mind.
- Install Sleekshot from the Mac App Store. It's free and needs no account.
- Press ⌘ + ⇧ + 2. The screen freezes, so open menus and tooltips stay where they are. If your fingers prefer ⇧ + ⌘ + 4, Sleekshot can take over that shortcut (Settings → Screenshots → Use ⇧⌘4 for Sleekshot).
- Drag over an area, click a window, or press ⌘ + A for the full screen.
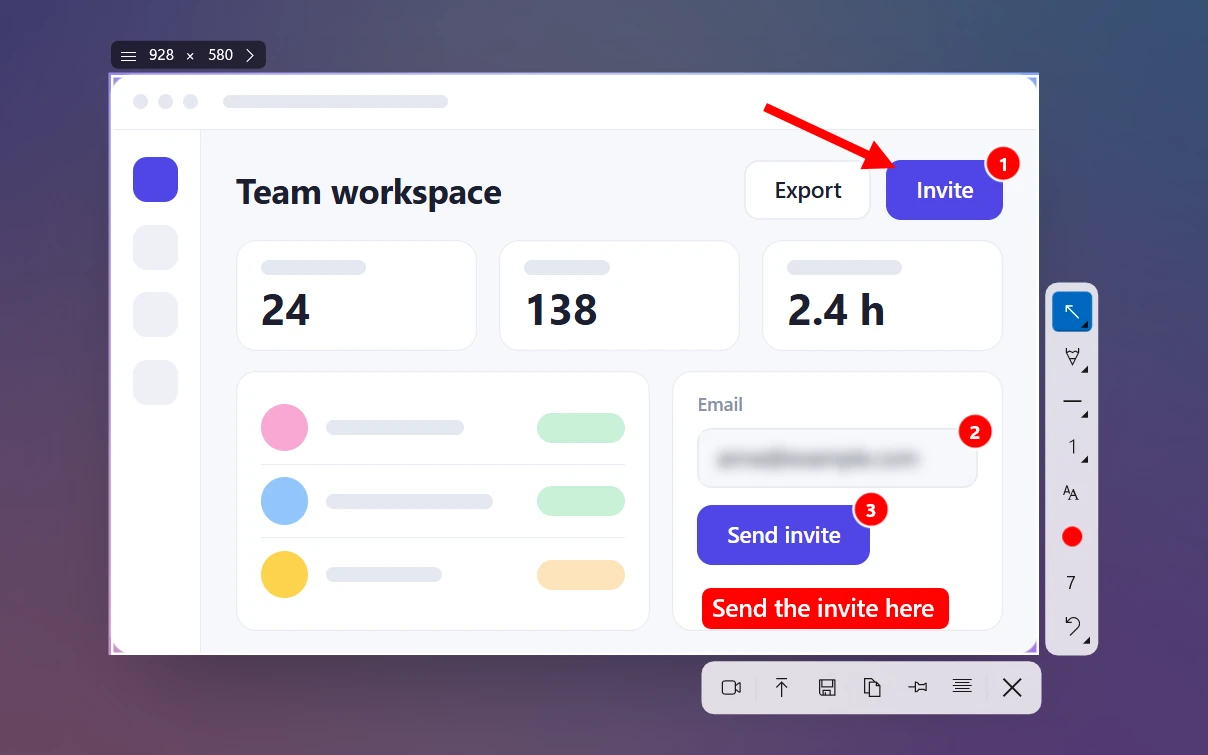
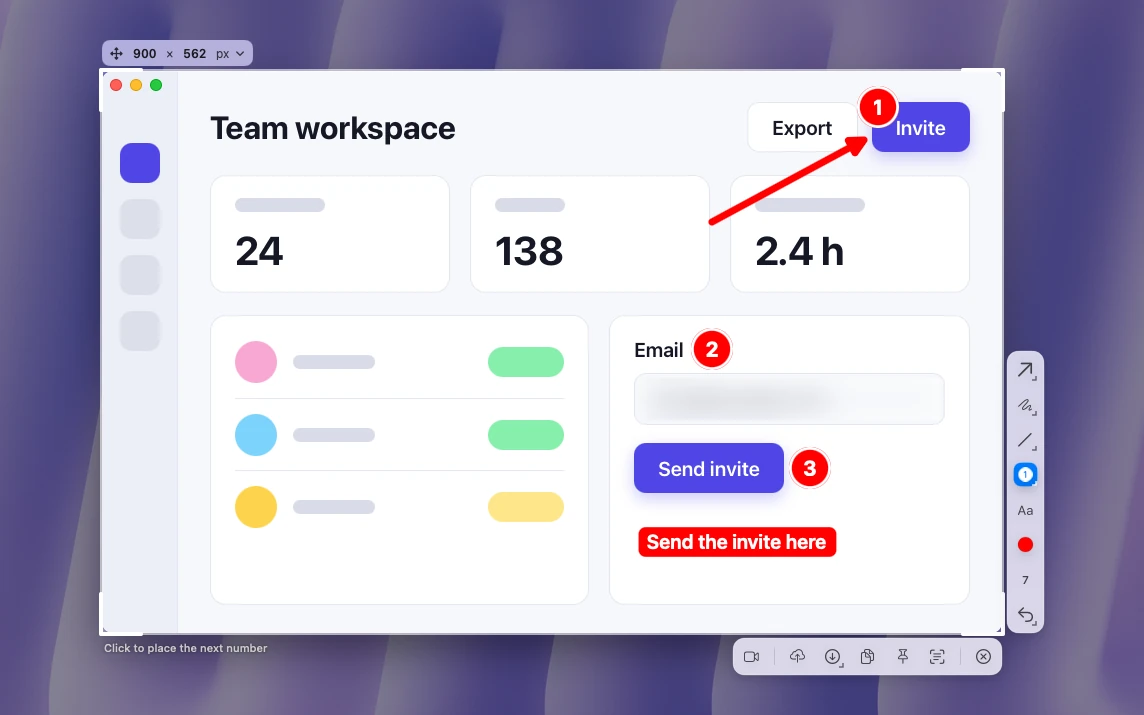
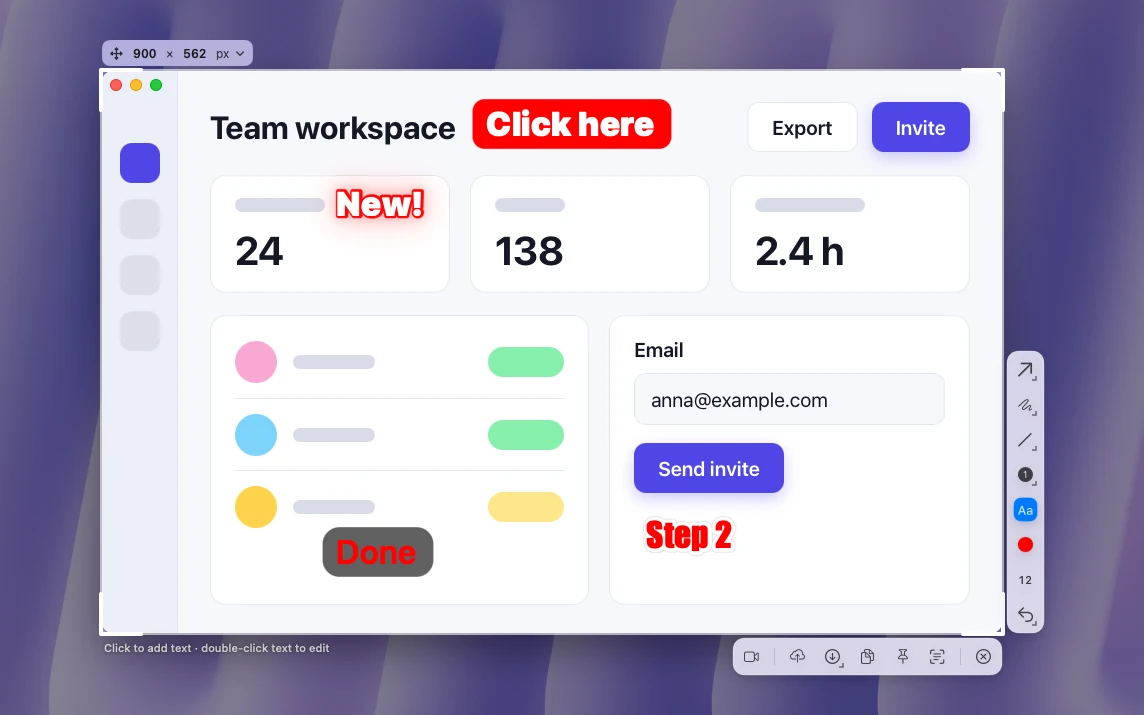
- Draw arrows, boxes, text, highlights, blur or step numbers. Choose from 20 colors, or any color in the macOS color picker. Scroll to change the brush size or the thickness of the shape under the pointer.
- Copy with ⌘ + C, save with ⌘ + S, pin the image on top of your windows with ⌘ + P, or upload it for a link with ⌘ + U. ⇧ + ⌘ + C copies the text from the area.
Nothing gets flattened while you work. Click any arrow, box or label to move, resize or rotate it. Hold ⇧ while rotating to snap to 15° steps. ⌘ + Z undoes and ⇧ + ⌘ + Z redoes, and every move counts as one step.
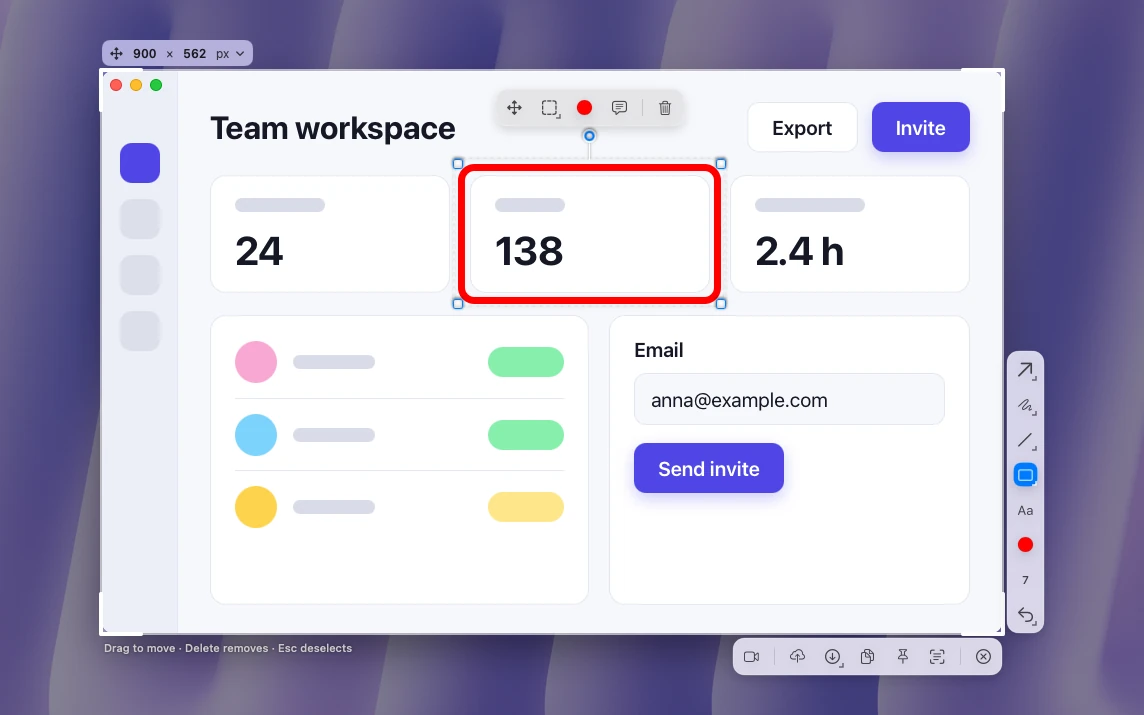
Sleekshot keyboard shortcuts for editing
Single-letter keys work once an area is selected, in any keyboard layout. There's no key for a select tool: click an arrow, box or label to select it. The tool that's active when you start is set in Settings → Screenshots → Default drawing tool (Arrow out of the box).
| Key | What it does |
|---|---|
| 1 to 7 | Arrow styles: Arrow, Sketchy, Hand, Highlighter, Doodle, Retro, Neon |
| P / ⇧ + P | Pen / dashed pen |
| H | Highlighter |
| L / ⇧ + L | Line / dashed line |
| R / E | Rectangle / ellipse |
| F / O | Filled rectangle / filled ellipse |
| B | Blur |
| S | Step numbers |
| T | Text |
| C | Next color |
| V | Switch to video mode |
| ⌘ + R | Start recording |
| ⌘ + Z / ⇧ + ⌘ + Z | Undo / redo |
| ⌘ + C | Copy the image |
| ⇧ + ⌘ + C | Copy the text in the image |
| ⌘ + S / ⇧ + ⌘ + S | Save / quick save to the last folder |
| ⌘ + P | Pin on top of other windows |
| ⌘ + U | Upload and copy a link |
| ⌥ + ⇧ + ⌘ + 2 | Capture the previous region again |
| Esc | Close the capture |
What it can't do: Sleekshot doesn't open image files, so for a screenshot you took last week, use Preview. It has no scrolling capture and no timer, and it's only on the Mac App Store.
Crop and resize a screenshot on a Mac
To crop in Preview, click Rectangular Selection in the Markup toolbar, drag around the part you want to keep and click Crop. To see the selection size in pixels while you drag, choose Tools → Show Inspector. In the thumbnail window, click Crop and drag the edges of the frame.
To resize, choose Tools → Adjust Size in Preview. Type a width or height, or pick a size from Fit into. Leave Scale proportionally on so the image doesn't stretch.
Tip: Screenshots from a Retina display are saved at double resolution, so an area that looks 800 pixels wide becomes a 1600-pixel image. Set Adjust Size to 50 percent to get the size people see on a regular monitor.
In Sleekshot, you crop by dragging the edges of the selection, even after you've drawn on it, and the drawings stay where they are. The size bar above the selection shows W × H. Type an exact size, or pick a preset for Shorts, Stories, slides or social posts. Under Settings → Screenshots → Image resolution, choose Native for full Retina pixels or Logical for smaller files.
How to draw on a screenshot on a Mac: arrows and shapes
In Markup, open the Shapes menu for lines, arrows, rectangles, ovals and more. Shape Style sets the line thickness and type and adds a shadow. Border Color and Fill Color change the outline and the inside. You can also use Sketch and draw freehand: if the stroke looks like a standard shape, Markup replaces it with a clean one. Hold Option while you drag a shape to make a copy.
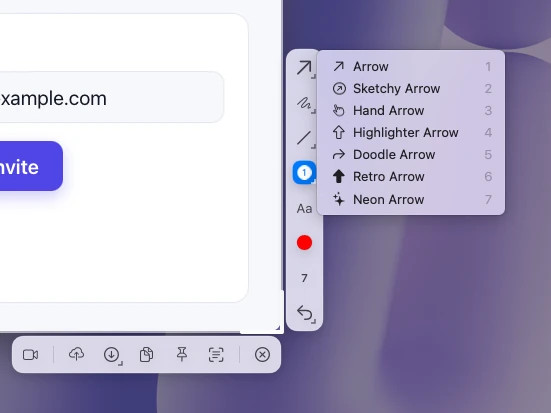
Sleekshot has 7 arrow styles on keys 1 to 7: Arrow, Sketchy Arrow, Hand Arrow (a pointing hand), Highlighter Arrow, Doodle Arrow, Retro Arrow and Neon Arrow. Hold ⇧ to snap the angle. There's a pen and a dashed pen, plus lines that snap to 45°.
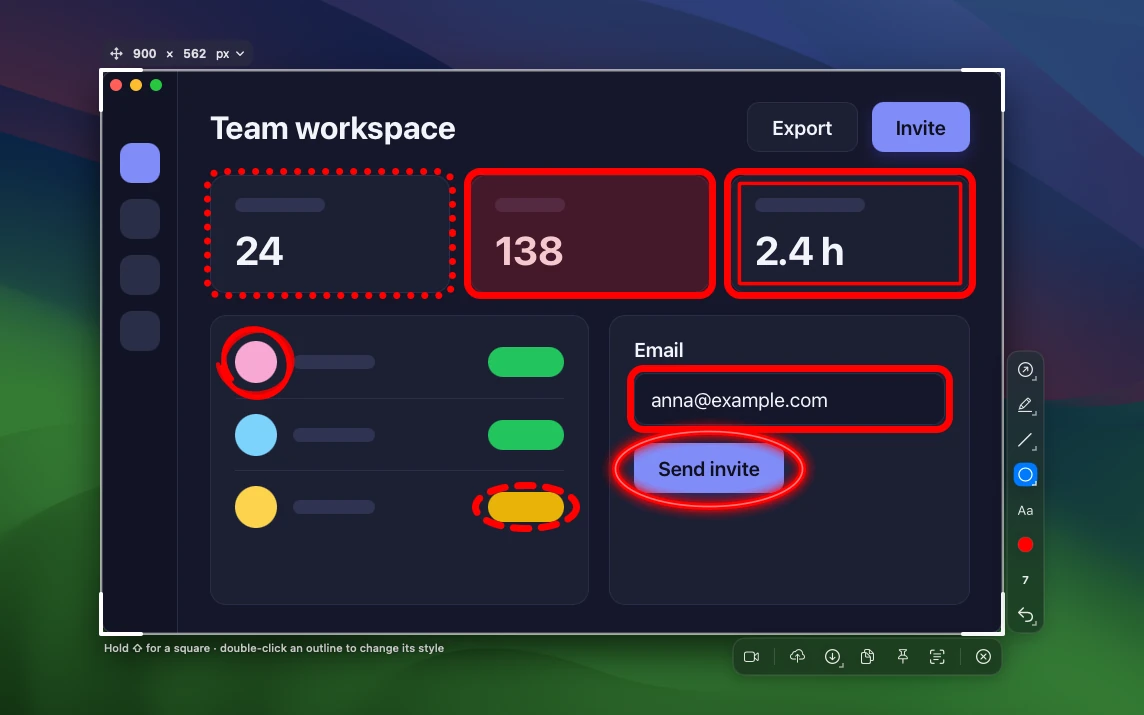
Rectangles (R) and ellipses (E) come in 7 styles: solid, sketch, neon, dashed, dotted, soft and double. Double-click a shape's outline to switch styles. For more on placing arrows so they point at the right thing, see how to draw an arrow on a screenshot.
How to add text to a screenshot on a Mac
In Markup, click Text, type, then drag the text box into place. Text Style changes the font, style and color.
Sleekshot gives you 6 text styles, including label, outline, glow and frosted glass, and 6 fonts, with alignment and emoji. Press T, click to add text and double-click it to edit. You can also type inside any rectangle or ellipse, and the shape grows to fit the words, which works well for callouts. Tips on size and contrast are in how to add text to a screenshot.
How to highlight on a screenshot on a Mac
Markup's Highlight sits in the Shapes menu. It keeps the area you choose bright and dims the rest of the image, like a spotlight. To mark a single line of text, a thin rectangle with a bright border usually reads better. Preview's Highlight Selection tool works on selected text in PDFs and isn't offered for image files.
Sleekshot has a see-through highlighter on H, so the words underneath stay readable. There's also the Highlighter Arrow on key 4 if you want to point and mark at once. More ideas, including colors that work, are in how to highlight text in a screenshot.
Hide emails, passwords and other private info
Apple's list of Markup tools for macOS 27 has no blur or pixelate option. To hide an email or a password, draw a rectangle from the Shapes menu and set Fill Color to a solid color. In Preview, the box can't be moved once you save the image, which is what you want here. If the private part is near the edge, crop it out instead.
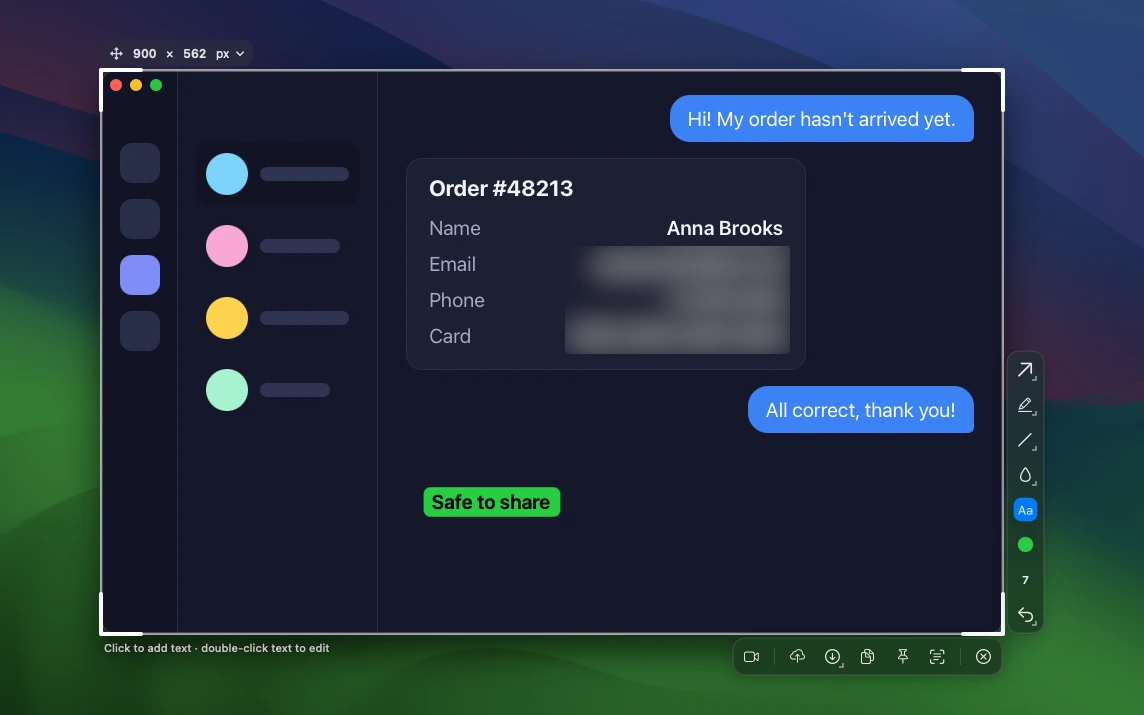
Sleekshot has a real blur tool (B) for passwords, emails and names. Filled rectangles and ellipses cover an area completely. For text, a solid box is the safest choice, because light blur can sometimes be guessed back. Our guide to blurring a screenshot explains when blur is enough.
Number the steps
Markup has no numbered markers. You can type 1, 2 and 3 in separate text boxes, but lining them up takes a while.
The step tool in Sleekshot (S) places numbered circles 1, 2, 3, so readers can follow the clicks in order. Our step-by-step screenshot guide shows how to plan the steps.
Add a signature or logo
Markup's Sign tool adds a signature. You can create one on the trackpad, with the camera, or on a nearby iPhone or iPad, and macOS keeps it for next time.
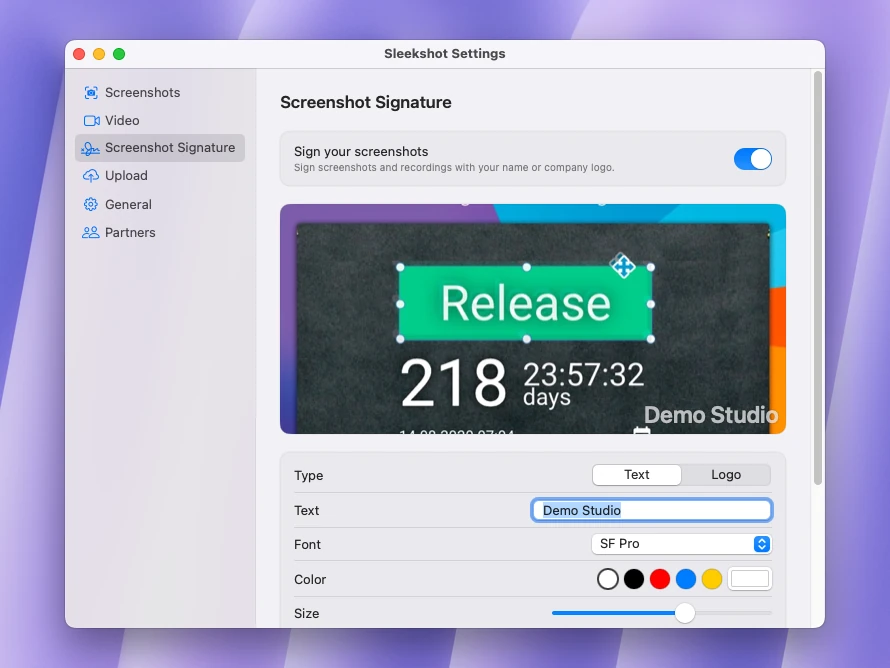
To brand screenshots, Sleekshot adds your name or logo to every screenshot and video. Turn it on in Settings → Screenshot Signature and choose the Type (Text or Logo), the text, font, color and size. A live preview shows how it looks. It's off until you set it up.
Save the edited screenshot as PNG, JPEG or HEIC
macOS saves screenshots as PNG. To change the format, open the file in Preview, choose File → Export and pick a format such as PNG, JPEG or HEIC. JPEG has a quality slider.
Keep PNG for screenshots of apps and websites, because JPEG blurs small text and thin lines. JPEG and HEIC make smaller files when the screenshot is mostly a photo or a video frame. Some websites and apps still don't accept HEIC, though, so check before you send it. Our screenshot format guide compares them.
In Sleekshot, ⌘ + S saves as PNG, JPEG or HEIC (set the format in Settings → Screenshots → File format), and ⇧ + ⌘ + S saves straight to the last folder you used. The Save menu also lists your 3 most recent folders.
Edit screenshots on a PC too? The steps for Snipping Tool, Paint and Photos are in how to edit a screenshot on Windows. For a side-by-side of annotation tools on both systems, see how to annotate a screenshot.
Frequently asked questions
How do I edit a screenshot on a Mac?
How do I draw on a screenshot on a Mac?
Can I blur part of a screenshot on a Mac?
Can I move Markup shapes after saving a screenshot in Preview?
How do I resize a screenshot on a Mac?
Can Sleekshot for Mac edit a screenshot I already saved?
Sleekshot Team
We build Sleekshot, a free screenshot and screen recording app for Windows and Mac. Every guide is checked on current Windows 11, Windows 10 and macOS builds.
Also available in: Deutsch Français Español Italiano Русский ភាសាខ្មែរ Bahasa Indonesia 简体中文 日本語