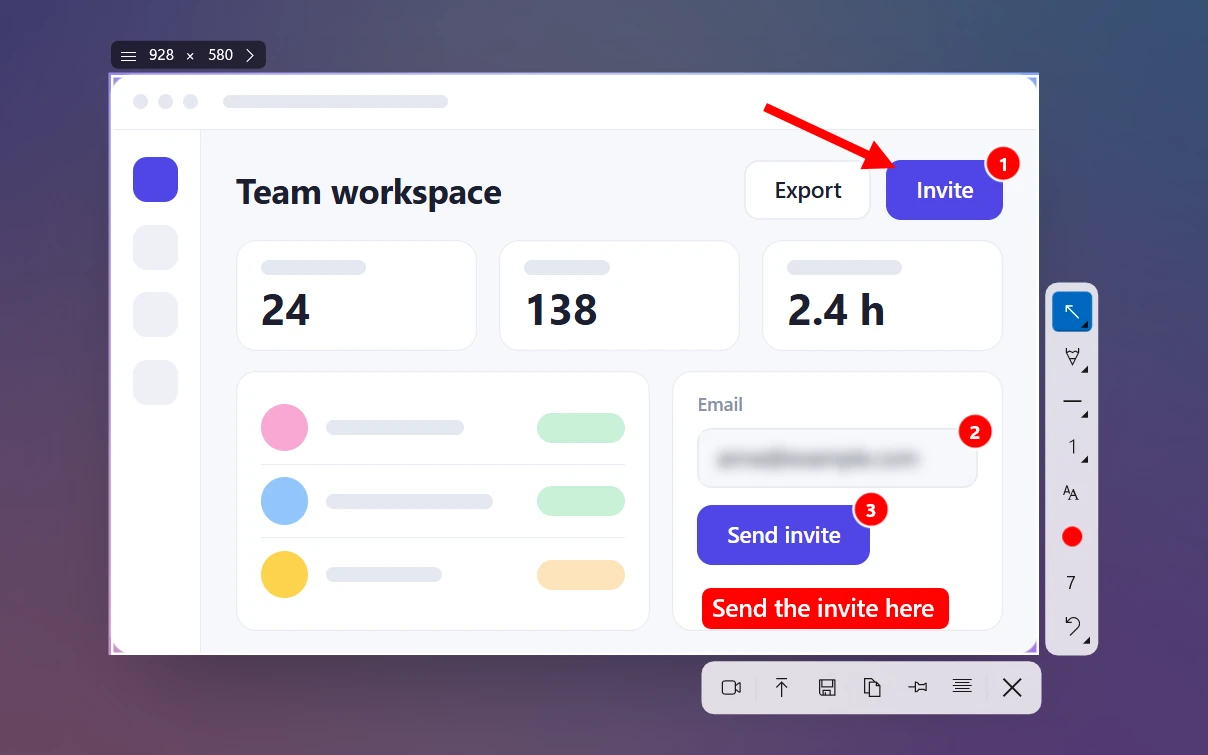
How to Blur Part of a Screenshot (and Hide Info Safely)
 By Sleekshot Team
8 min read
Short answer
To hide part of a screenshot safely, cover it with a solid filled rectangle. Blur and pixelation look nicer, but on text they can sometimes be undone. In Sleekshot, press PrtSc, select the area, then press B for a blur box or F for a solid one. Without extra apps, use Snipping Tool's Text actions → Redact text or a filled shape on Windows 11. On a Mac or iPhone, draw a filled rectangle in Markup.
On this page
- Blur, pixelate or solid box: which one is safe?
- Method 1: Blur or black out as you take the screenshot (Sleekshot for Windows)
- Method 2: Black out text in Snipping Tool (Windows 11)
- Method 3: Pixelate or black out in Paint
- Method 4: Blur or hide part of a screenshot on a Mac
- Method 5: Hide information in a screenshot on iPhone or Android
- Before you share: a checklist
The safest way to hide part of a screenshot is to cover it with a solid filled rectangle. Blur and pixelation look tidier and are fine for faces or a messy background, but on text they can sometimes be undone. On Windows 11, Snipping Tool has no blur tool, but it can black out text with Redact text. Paint can pixelate a selection. In Sleekshot, you press B for a Blur rectangle or F for a Filled rectangle right on the screenshot, so the private part never reaches a saved file.
Blur, pixelate or solid box: which one is safe?
A solid box is the only method that can't be undone. Blur and pixelation keep a scrambled copy of the original pixels. For text in a known font, that's often enough to guess the words.
| Method | What it looks like | Can it be undone? | Use it for |
|---|---|---|---|
| Solid filled box | A clear black bar | No, the pixels are replaced | Passwords, API keys, card and account numbers, IDs |
| Strong blur | Soft, tidy | Hard, but light blur on text can be guessed | Faces, background windows, chat previews |
| Pixelation (mosaic) | Blocky squares | Yes for text: Depix and Unredacter exist | Photos and faces, not secrets |
| Crop | The area is gone | No, if you save a new file | Anything near the edge of the image |
| Marker scribble | Rough strokes | Often, with a few quick photo edits | Never use it to hide data |
Why light blur and pixelation can be undone
Blur and pixelation are predictable math: the same input always gives the same output. Someone who knows the font and size can type guesses, blur or pixelate them the same way and pick the closest match. Knowing the font is easy when the screenshot shows a familiar app. Depix, published on GitHub in 2020, does this for pixelated screenshots, and Bishop Fox's Unredacter improved on it. Bishop Fox's own advice is blunt: if you're hiding text, black bars are the only safe way.
Short values with few possible characters are the easiest to guess: PINs, card numbers, one-time codes. Two more things give the text away even under strong blur: the length of the hidden word and what's around it. Make the box wider than the value, and use the same size for every field you hide.
Method 1: Blur or black out as you take the screenshot (Sleekshot for Windows)
In Sleekshot, you hide private data before anything is copied, saved or uploaded. No unblurred file is left behind.
- Press PrtSc (Sleekshot's default shortcut) and drag over the area, or click a window.
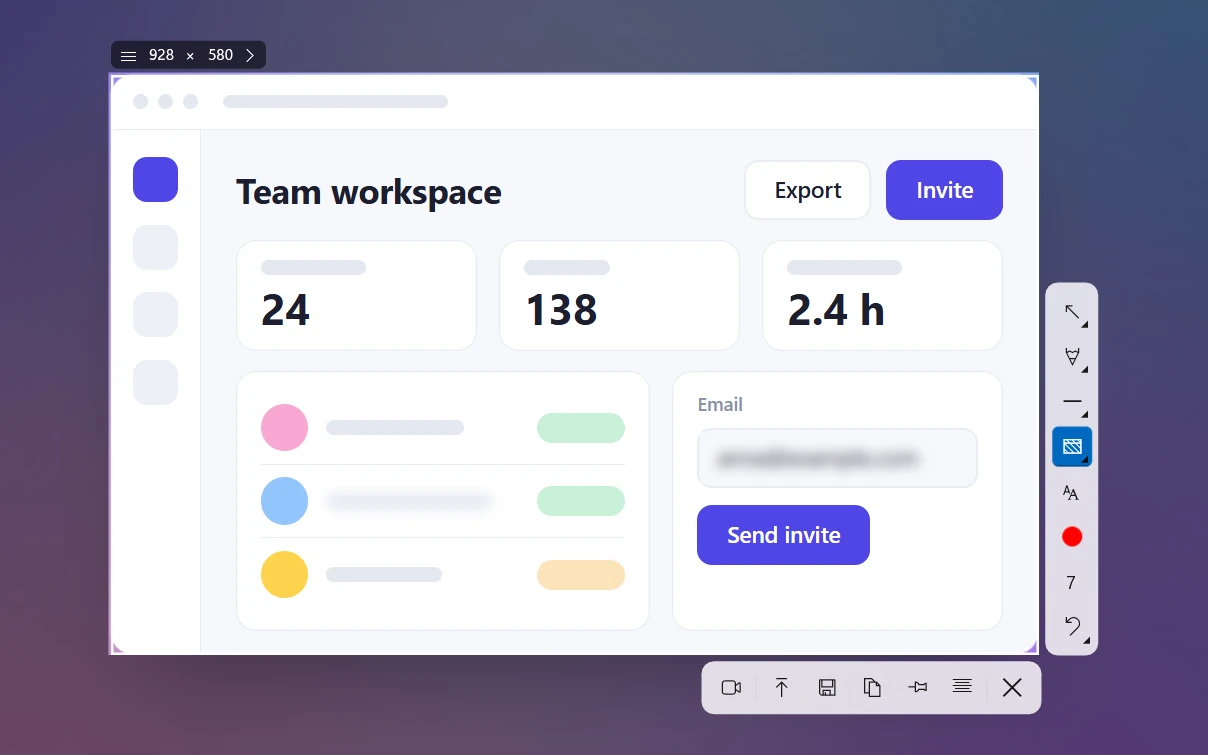
- Press B for Blur rectangle and drag over the part you want to blur.
- For passwords, tokens and account numbers, press F for Filled rectangle instead. Press C to pick the color: black, or the background color for a cleaner look.
- Press Ctrl + C to copy, Ctrl + S to save, or Ctrl + U to upload and get a short link. The uploaded image is the blurred one.
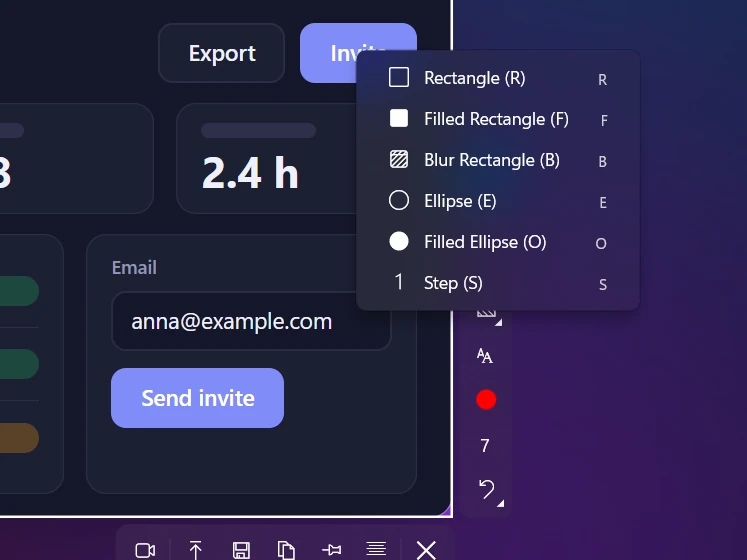
Both tools are also in the shapes menu, next to the rectangle, ellipse and step numbers. If you blur something on almost every screenshot, set Settings → Screenshots → Default drawing tool to Blur. The blur box is then ready as soon as you select an area.
Our rule of thumb: use blur (B) for names in a chat, profile pictures and anything that's just distracting. Use the filled rectangle (F) for anything that gives access to an account or identifies a person. The saved PNG, JPEG or WebP is a flat image with no layers, so nobody can lift the box off later. Undo (Ctrl + Z) goes one step back. Boxes can't be moved once drawn, so undo and draw again.
Method 2: Black out text in Snipping Tool (Windows 11)
Snipping Tool has no blur tool, but Text actions can black out the text it recognizes. You can also fill its shapes with a solid color.
- Press Win + Shift + S, drag over the area and click the notification to open the screenshot in the editor.
- Click Text actions in the toolbar. Snipping Tool looks for text in the image.
- Click Quick redact to black out every email address and phone number. Use the arrow next to it to limit it to emails or phone numbers.
- To hide anything else, select the words, right-click and choose Redact text.
- For parts that aren't text, like a profile picture or a QR code, open Shapes, draw a rectangle and set Fill to a solid color.
- Press Ctrl + S and save it as a new file.
Text actions need Snipping Tool 11.2308.33.0 or later. Filled shapes arrived in 11.2401.32.0. If you don't see them, update the app from the Microsoft Store. Snipping Tool only hides text it can read, so check small or stylized text yourself.
Method 3: Pixelate or black out in Paint
Paint has no blur filter, but the old shrink-and-enlarge trick pixelates any selection.
- Open the screenshot in Paint and use Select → rectangle to mark the area.
- Press Ctrl + W (Resize and skew), choose Percentage and set 10% horizontally and vertically.
- Press Ctrl + W again and enlarge the selection back to its original size (1000%). If Paint won't take that in one go, do it in two steps: 500%, then 200%.
- Click outside the selection and save it as a new PNG.
You get blocky pixelation. That's fine for a photo, not for a password. For secrets, draw a rectangle from Shapes with Fill set to Solid color instead.
The Windows 11 Photos app has Background blur with a selection brush. It's made for portraits. You can paint blur onto other areas, but the edges are soft and it's hard to judge how strong it is on small text. We don't use it to hide anything.
Method 4: Blur or hide part of a screenshot on a Mac
Preview has no blur tool. On a Mac, cover the area with a filled shape, or use a screenshot app that has blur.
- Open the screenshot in Preview and click Show Markup Toolbar.
- Open Shapes and choose the rectangle.
- Drag it over the information. Set Fill Color to black (or any solid color) and the border to the same color.
- Save or export as PNG. When you save a PNG or JPEG, Preview flattens the shapes into the image.
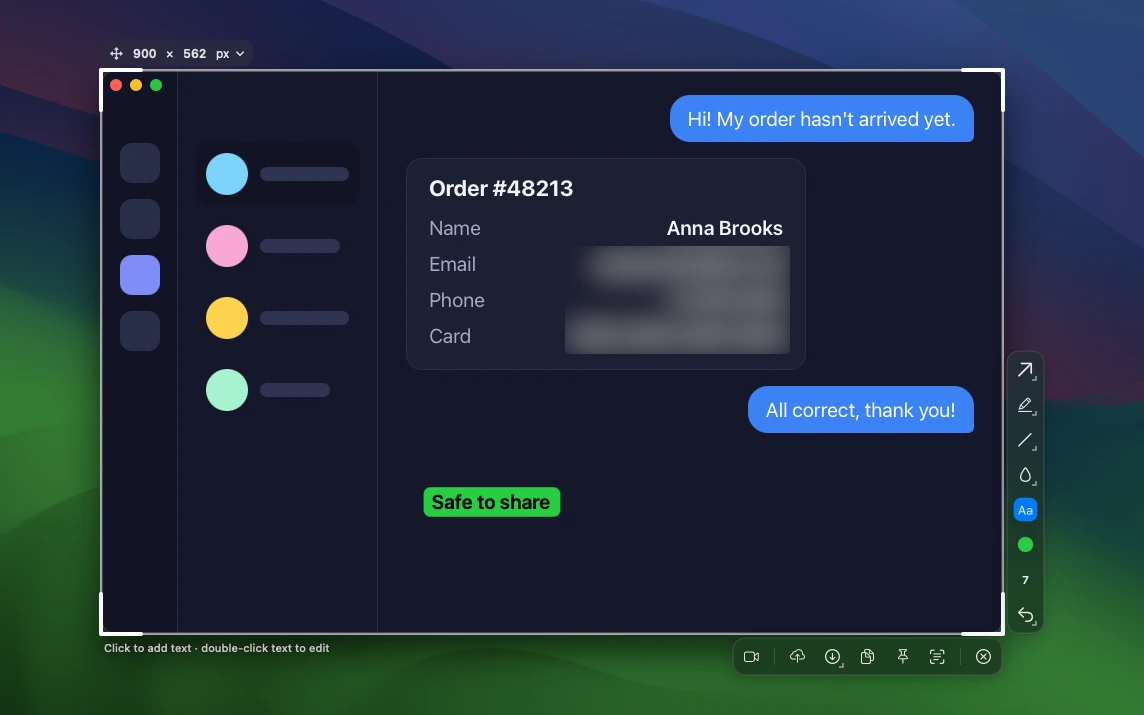
Sleekshot for Mac has a real blur tool, plus filled rectangles and ellipses for redaction. Press ⌘ ⇧ 2 and drag over the area. Pick blur (B) or a filled shape (F or O), drag it over the private part and press ⌘ C to copy. The box stays editable, so you can move or resize it if it misses a letter. The rule is the same as on Windows: blur for clutter, the filled box for secrets. Our guide to editing a screenshot on a Mac covers the other tools.
Method 5: Hide information in a screenshot on iPhone or Android
Phone editors don't have a real blur either, so use a solid shape or crop.
- iPhone and iPad: take the screenshot and tap the thumbnail. Tap + and add a square. Switch it to the filled style, keep opacity at 100% and drag it over the text. Don't scribble with the marker or pen. Gadget Hacks showed that text blacked out this way can be revealed with a few quick edits in the Photos app.
- Android: Google Photos Markup has a pen, highlighter and text, but no shapes. If you can, crop the private part away. If not, move the screenshot to a computer and hide it there.
Before you share: a checklist
Hiding the obvious field is only half the job. Personal data shows up in places people forget to check, and the file itself can still give things away.
- Check the whole image, not just the form. Look at the address bar (URLs can contain session tokens and IDs), tab titles, and your name and profile picture in a corner. Look for file paths like
C:\Users\<name>, notifications, chat previews, bookmarks and QR codes. - Cover the whole value plus a margin, with the same box size for every field.
- Save a new file instead of overwriting the old one. In 2023, the aCropalypse bug (CVE-2023-28303) let people recover cropped-out parts of images that Snipping Tool or Snip & Sketch saved over the original. Microsoft fixed it in Snipping Tool 11.2302.20.0. Files cropped before the fix stay vulnerable until you crop them again.
- Zoom in to 200% and check the edges of every box.
- Watch for cloud copies. If OneDrive or another sync app saves screenshots on its own, the original may already be uploaded. See screenshots and OneDrive.
Pointing at things matters as much as hiding them. A clear bug report screenshot usually needs both a blur box and an arrow. And a see-through marker hides nothing. Our guide to highlighting text in a screenshot explains when to use one. More pitfalls are in common screenshot mistakes.
Frequently asked questions
Can blurred or pixelated text in a screenshot be recovered?
Does Snipping Tool have a blur tool?
How do I blur part of a screenshot on a Mac?
How do I hide information in a screenshot on iPhone?
Is cropping safer than blurring?
Sleekshot Team
We build Sleekshot, a free screenshot and screen recording app for Windows and Mac. Every guide is checked on current Windows 11, Windows 10 and macOS builds.
Also available in: Deutsch Français Español Italiano Русский ភាសាខ្មែរ Bahasa Indonesia 简体中文 日本語