Annotate Screenshots Without an Editor: Arrows, Steps, Blur
Sleekshot is a free screenshot annotation tool for Windows 10 and 11. Press PrtSc, select an area and draw right on the screenshot, with no separate editor window. You get 7 arrow styles, steps that number themselves, blur for private info, a highlighter, text labels, shapes and 20 colors. Every tool has its own key.
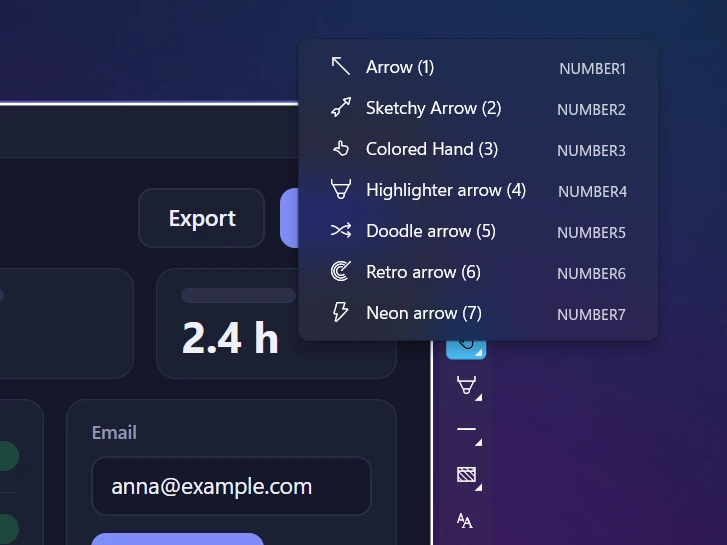
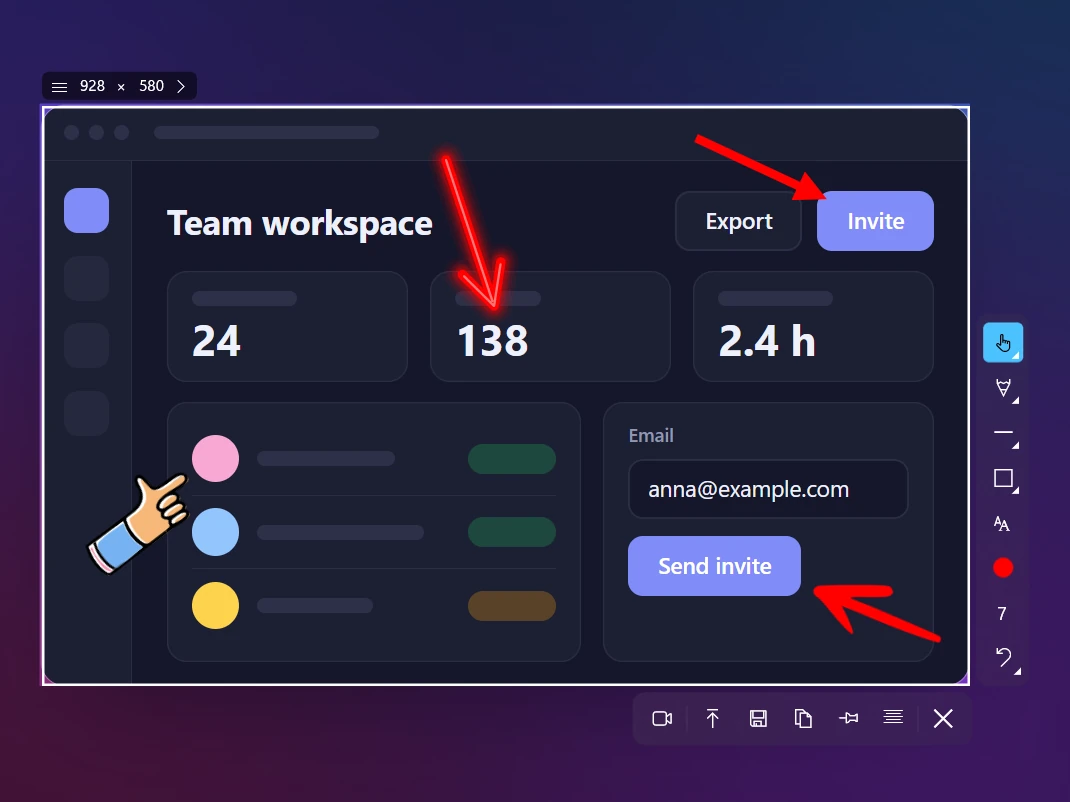
From the clean default Arrow to hand-drawn Sketchy and Doodle and the glowing Neon arrow. Keys 1–7 switch styles in a single press.
Numbered steps
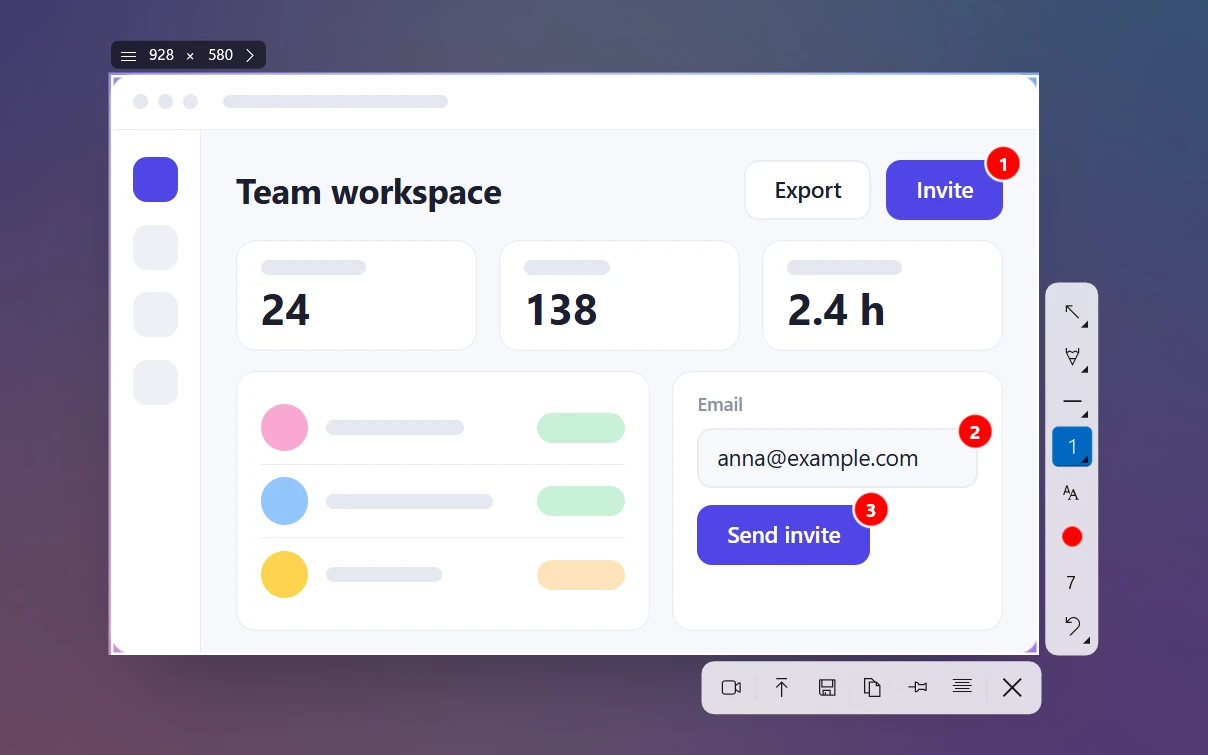
Press S and click. The circles number themselves 1, 2, 3…, ready for a how-to guide.
Blur for private info
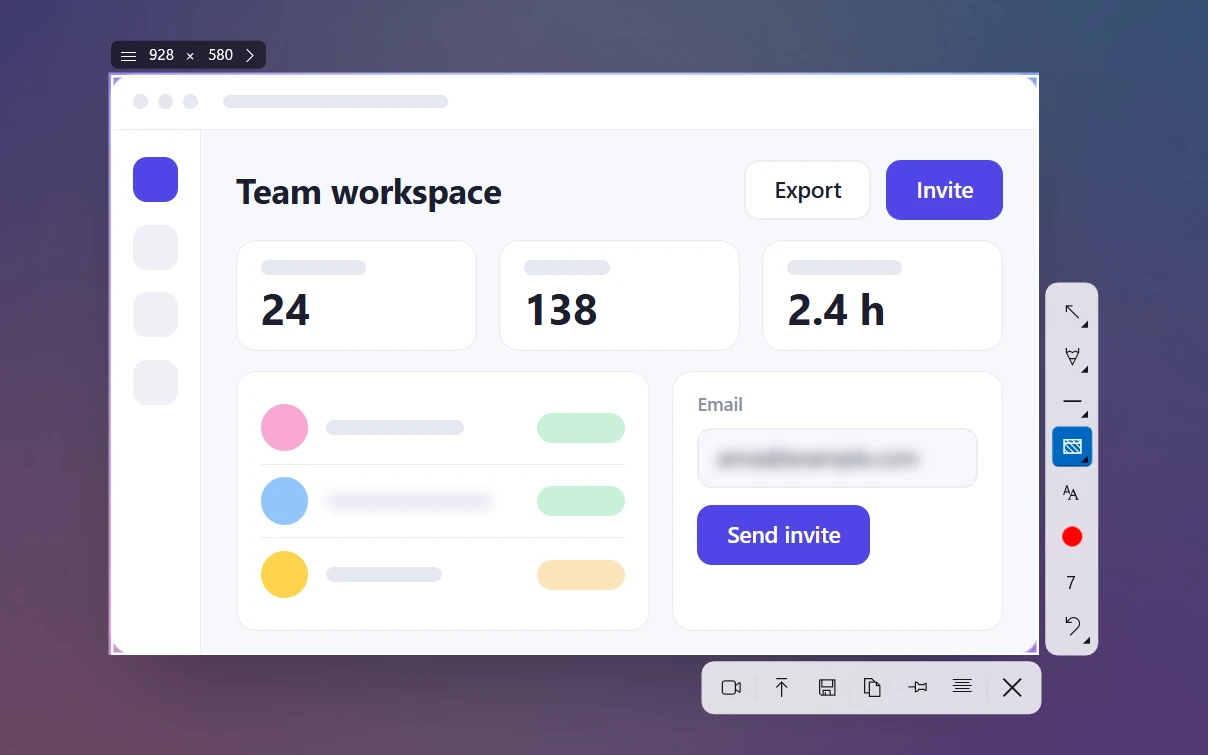
Drag a blur box (B) over emails, names or tokens before you share the image.
Text and highlighter
Text labels, filled or plain, that you can drag around, plus a see-through highlighter for lines of text.
One key per tool
Every tool has its own key, and the mouse wheel sets the brush size from 1 to 100.
To add arrows and text to a screenshot on Windows with Sleekshot, press PrtSc, drag over the area you need and start drawing. The toolbar opens right next to the selection, on top of the screenshot. There's no editor window to wait for and no file to open. When the arrows and labels are in place, Ctrl + C copies the finished image and Ctrl + S saves it.
The idea is Lightshot's speed with a much bigger set of tools. You get seven arrow styles, numbered steps, blur, a highlighter, text labels and shapes. Every tool has its own key, so most screenshots take a few seconds instead of a trip through Paint.
How drawing right on the screenshot works
Sleekshot takes a still picture of the screen the moment you press the key. Open menus, tooltips and hover effects stay exactly as they were. You draw on that picture, inside your selection.
Drag over an area, click a window or press Ctrl + A for the whole monitor.
Pick a tool on the toolbar or press its key: 1 for an arrow, T for text, B for blur.
Draw. Turn the mouse wheel anywhere to make the line thicker or thinner (1–100).
Press Ctrl + C to copy, Ctrl + S to save or Ctrl + U to get a link you can share.
Made a mistake? Ctrl + Z removes the last mark. Undo goes back one step only, and there's no redo. If you always start with the same tool, set it in Settings → Screenshots → Default drawing tool.
7 arrow styles
Arrows are what most screenshots need, so Sleekshot has seven of them. 1 picks the default Arrow, and keys 2–7 switch to the other six without opening the menu.
Key
Arrow style
1
Arrow (default)
2
Sketchy
3
Colored Hand
4
Highlighter arrow
5
Doodle
6
Retro
7
Neon arrow (a smooth glowing tube)
Hold Shift while you draw to snap an arrow to 0°, 45° or 90°. Several styles have two looks. Drag with the left mouse button for a clean arrow in your chosen color, or with the right button for the other version.
For documentation and bug reports, we stick to the default Arrow. Hand-drawn styles like Sketchy and Doodle suit tutorials and social posts, where a more casual look fits. More ideas in our guide to drawing arrows on screenshots.
Seven arrow styles, each on its own key
Numbered steps, text labels and highlighter
Numbered steps (S) turn a screenshot into instructions. Click once per step, and Sleekshot places circles numbered 1, 2, 3… in order, so you never type a number by hand. It's the fastest way to build a step-by-step screenshot guide.
Text (T) adds a filled label that's easy to read on any background. Double-click to switch to plain text. You can drag labels after you place them, and the mouse wheel changes the font size. Details in how to add text to a screenshot.
Highlighter (H) draws a see-through stroke (40% opacity), like a marker on paper. Use it to pick out one line in a log or a sentence in a document. Next to it are the Pen (P) and the Dashed pen (Shift + P) for circles and notes by hand. Line (L) and Dashed line (Shift + L) draw straight connectors.
The steps number themselves
Blur and shapes to hide private info
Press B and drag a blur box over an email address, a customer name or an API token before you share the image. The other shapes are in the same group: Rectangle (R), Filled rectangle (F), Ellipse (E) and Filled ellipse (O).
Tip: For passwords, keys and card numbers, use a Filled rectangle instead of blur. A solid box leaves nothing to recover. Our guide to blurring screenshots explains when blur is enough.
Blur personal info before you share
Colors, sizes and every tool's key
The color button (C) opens 20 colors. Press C again and again to go through them. The mouse wheel sets the brush size from 1 to 100 wherever the pointer is, and for text it changes the font size.
You can't move arrows and shapes after you draw them. Undo and draw them again instead. Only text labels can be dragged. Undo goes back one step, and there's no redo.
It can't open saved images. Sleekshot works with what's on screen when you take the screenshot. To add arrows to a file you already have, open it on screen and take a new screenshot.
No backgrounds, frames or mockups around the screenshot, and no scrolling screenshots.
The Mac version has fewer tools: an arrow, a rectangle, a filled rectangle, an ellipse, pixel blur, a line, a pencil and text. See Sleekshot for Mac.
For a wider walkthrough that also covers the tools built into Windows, read how to annotate a screenshot. Or download Sleekshot and press PrtSc.
Frequently asked questions
How do I annotate a screenshot on Windows with Sleekshot?
Press PrtSc and select an area. The toolbar appears next to it. Pick a tool, for example 1 for an arrow or T for text, and draw right on the screenshot. Then press Ctrl+C to copy it or Ctrl+S to save it.
Can I move an arrow after drawing it?
Not yet. Arrows, lines and shapes stay where you drew them. Press Ctrl+Z to remove the last one and draw it again. You can drag text labels until you copy or save.
How do I blur part of a screenshot?
Press B (Blur rectangle) and drag over the area you want to hide. For passwords or keys, a Filled rectangle (F) is safer, because it covers the text completely.
Can Sleekshot annotate an image file I already have?
No. Sleekshot works with what's on your screen when you take the screenshot, and it can't open saved images. Open the image on screen, for example in the Photos app, and take a new screenshot of it.
How do I change the color or line thickness?
Press C to go through the 20 colors, or click the color button to pick one. Turn the mouse wheel anywhere to set the brush size from 1 to 100. For text, the wheel changes the font size.
Add an arrow to a screenshot on Windows with Snipping Tool, Paint, Photos or Sleekshot's 7 arrow styles. Steps for each, plus tips for arrows people notice.