How to Draw an Arrow on a Screenshot (Windows 11 & 10)
 By Sleekshot Team
6 min read
By Sleekshot Team
6 min read
Short answer
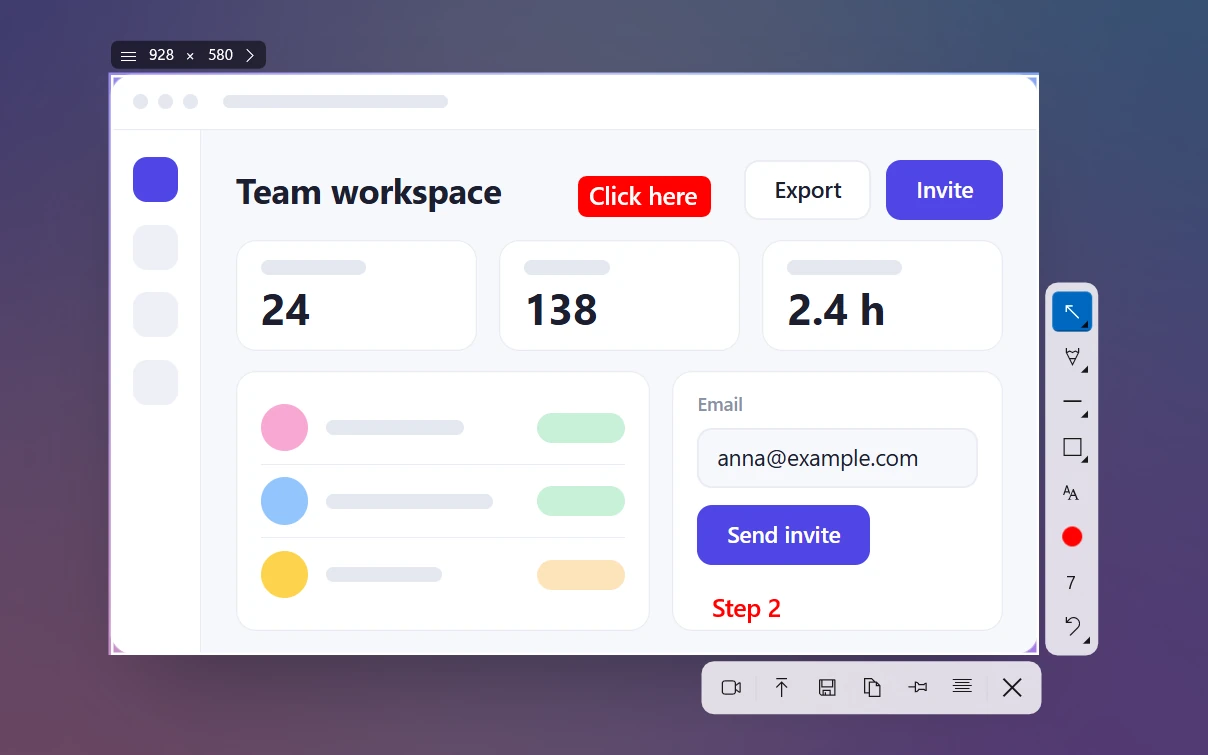
In Windows 11 Snipping Tool, click Shapes, pick the arrow and drag from empty space toward the target. Recent versions also straighten a pen line into an arrow if you hold the mouse still at the end. Paint has block arrows in four directions, and the Photos app can add an arrowhead to a freehand pen line. In Sleekshot (free), you press 1 and drag right on the screenshot. There are 7 arrow styles, and Shift snaps the angle to 45 or 90 degrees.
On this page
- Ways to add an arrow on Windows compared
- Method 1: Use the arrow shape in Snipping Tool (Windows 11)
- Method 2: Draw a block arrow in Paint
- Method 3: Add an arrowhead to a pen line in Photos
- Method 4: Draw arrows in 7 styles with Sleekshot
- Drawing an arrow on a Mac screenshot
- Tips for arrows people actually notice
To draw an arrow on a screenshot in Windows 11, open it in Snipping Tool and click Shapes. Choose the arrow and drag from empty space toward the thing you want to point at. Older guides say Snipping Tool has no arrow, but that changed with the 2024 updates. Paint has chunky block arrows, and the Photos app can put an arrowhead on a freehand pen line. In a screenshot app like Sleekshot, you draw arrows right on the screenshot, in 7 styles.
Below are all four methods with exact steps, then the placement tips that make an arrow help instead of clutter.
Ways to add an arrow on Windows compared
Each app draws arrows differently. Here's what you get.
| Tool | How to add an arrow | Straight? | Style options | Change it after drawing |
|---|---|---|---|---|
| Snipping Tool (Windows 11) | Shapes → Arrow, then drag | Yes | Outline color and thickness | Resize or rotate while it's selected |
| Snipping Tool, draw and hold | Pen stroke, hold still at the end | Yes, straightened for you | Pen color and thickness | Undo only |
| Paint | Shapes → right, left, up or down arrow | Block arrow, 4 directions | Outline, fill, size | Until you click outside it |
| Photos | Markup → pen → arrow line type | Freehand | Single or double arrowhead | Eraser |
| Sleekshot | Press 1 and drag on the screenshot | Yes; Shift snaps to 0/45/90° | 7 styles, 20 colors, thickness 1–100 | No; Ctrl + Z and draw again |
Method 1: Use the arrow shape in Snipping Tool (Windows 11)
Snipping Tool's Shapes button has an arrow. It's the quickest built-in way to point at something right after you take a screenshot.
- Press Win + Shift + S (or PrtSc on Windows 11) and drag over an area.
- Click the notification in the bottom-right corner to open the editor.
- Click Shapes and choose the arrow.
- Drag from where the arrow should start to the target. The arrowhead appears where you let go of the mouse.
- While the arrow is still selected, drag its handles to change the length and angle. You can also change the outline color and thickness.
- Press Ctrl + S to save or Ctrl + C to copy.
Draw and hold. In Snipping Tool 11.2502.18.0 and later, you can also pick the Pen and draw a rough arrow. Hold the mouse still for a moment before you let go. Snipping Tool swaps the stroke for a straight line with a clean arrowhead. The downside: it sometimes changes strokes you wanted to keep freehand, and you can't turn it off. Let go without pausing, or press Ctrl + Z right after.
On Windows 10, Snip & Sketch has no shapes at all. Use Paint (below) or a screenshot app with an arrow.
Method 2: Draw a block arrow in Paint
Paint's Shapes gallery has arrows pointing right, left, up and down. They're thick block arrows, good for big, obvious pointers.
- Open the screenshot in Paint. Paste it with Ctrl + V, use File → Open, or choose Edit with Paint in Snipping Tool.
- In the Shapes gallery, choose the arrow pointing the way you need.
- Set Outline to a solid color. Set Fill to a solid color for a filled arrow, or no fill for an outline.
- Pick a size and color, then drag the arrow onto the image. Hold Shift to keep the proportions.
- Adjust it with the handles before you click anywhere else. After that, it turns into ordinary pixels.
- Save with File → Save as → PNG.
Diagonal arrows in Paint. You can't rotate the arrow shapes to 45 degrees. Use the Line tool instead, and hold Shift to lock the line horizontal, vertical or at 45 degrees. Then draw two short lines at the tip for the arrowhead. It takes three strokes, but you get a thin, precise arrow.
Method 3: Add an arrowhead to a pen line in Photos
The Windows 11 Photos app can turn any pen stroke into an arrow. It's handy for a screenshot you saved earlier.
- Double-click the screenshot to open it in Photos, then press Ctrl + E (Edit image).
- Open Markup and pick one of the pens.
- In the pen options, set the line type to single arrow (or double arrow).
- Draw the line. The arrowhead appears at the end of the stroke.
- Choose Save as copy to keep the original.
The line follows your hand exactly, so short strokes look best. For long, straight arrows, Snipping Tool or Sleekshot do a cleaner job.
Method 4: Draw arrows in 7 styles with Sleekshot
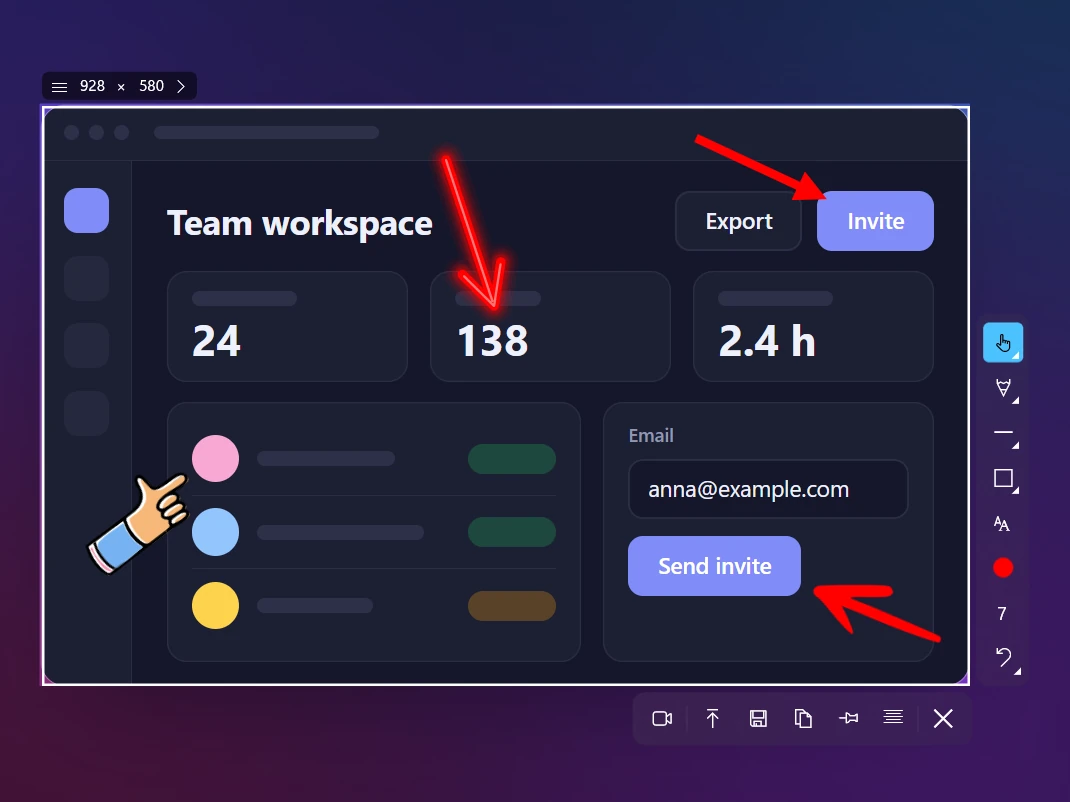
Sleekshot is a free screenshot and screen recording app for Windows 10 and 11. You draw arrows right on the screenshot: press PrtSc, select an area, press 1 and drag.
- Press PrtSc and drag over an area. Or click a window, or press Ctrl + A for the whole screen.
- Press 1 for the default arrow. For another style, open the arrow menu or press 2–7.
- Drag from the start point to the target and let go where the tip should be. Hold Shift to snap the angle to 0, 45 or 90 degrees.
- Press C to go through the 20 colors. Scroll the mouse wheel to set the thickness from 1 to 100.
- Made a mistake? Ctrl + Z removes the last arrow. Arrows can't be moved once drawn, so undo and draw it again.
- Copy (Ctrl + C), save (Ctrl + S) or upload it for a link (Ctrl + U).
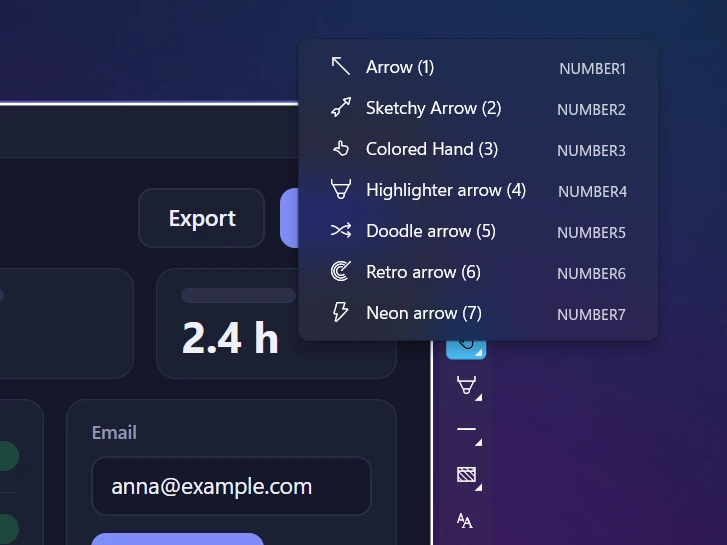
| Style | Key | Good for |
|---|---|---|
| Arrow | 1 | The default clean arrow for docs and support replies |
| Sketchy | 2 | A hand-drawn look for informal notes |
| Colored Hand | 3 | Hand-drawn and colorful, for friendly explainers |
| Highlighter arrow | 4 | An arrow that looks drawn with a marker |
| Doodle | 5 | Playful doodles |
| Retro | 6 | A stylized arrow for social posts and thumbnails |
| Neon arrow | 7 | A smooth glowing tube that stands out on dark apps |
Several styles come in two versions. Drag with the left mouse button for the tinted, clean version, or with the right button for the other drawing.
Arrows work well with step numbers, text labels and blur on the same screenshot. See how to annotate a screenshot and the arrows, steps and blur page.
Drawing an arrow on a Mac screenshot
On a Mac, press Shift + Command + 4 and click the thumbnail that appears to open Markup. Pick the arrow from the Shapes menu and drag it into place. If you'd rather add the arrow before you save, Sleekshot for Mac is free: press ⌘ + ⇧ + 2, drag over an area and press A. The Mac version has one standard arrow, not the seven Windows styles.
Tips for arrows people actually notice
An arrow should get the reader to look at one spot within a second. These habits help.
- Point, don't cover. Stop the tip a few pixels short of the target, so the button or value stays readable.
- Start in empty space. Draw from a quiet area toward the target. A 45-degree angle (hold Shift in Sleekshot) looks natural and rarely crosses anything else.
- Keep it short. An arrow that crosses half the screenshot drags the eye through things that don't matter.
- Don't overdo it. One arrow per target, and ideally no more than two or three per image. For a series of clicks, switch to numbered steps.
- Use contrast. Red or orange on light apps, a bright or neon color on dark ones.
- Make it thick enough. A 4K screenshot shrinks a lot in a chat thumbnail, and a 2–3 px arrow vanishes. Go thicker on big screenshots.
- Label the tail, not the tip. If the arrow needs a word of explanation, put a short text label at the start of the arrow so the tip stays clear.
Frequently asked questions
Does Snipping Tool have an arrow tool?
Why does Snipping Tool turn my pen lines into arrows?
How do I draw a diagonal arrow in Paint?
How do I change the arrow color and thickness in Sleekshot?
How do I draw an arrow on a screenshot on a Mac?
Sleekshot Team
We build Sleekshot, a free screenshot and screen recording app for Windows and Mac. Every guide is checked on current Windows 11, Windows 10 and macOS builds.
Also available in: Русский