How to Screen Record on Mac with Audio: Your Voice and the Mac's Own Sound
 By Sleekshot Team
10 min read
Short answer
To record your voice, press Shift-Command-5, click Options and choose a microphone. That works on every recent macOS. To record the Mac's own sound (system audio), choose Options → Include System Audio, which exists only in macOS 27 Golden Gate or later. On macOS 13 to 26, the built-in tools record a microphone only, so use an app that captures system audio, like the free Sleekshot for Mac or OBS Studio, or install the BlackHole virtual audio driver. On macOS 12 Monterey, BlackHole is the option left.
On this page
- Mac screen recording with sound: what works on your macOS
- Record your voice: microphone only (any macOS)
- Record the Mac's sound on macOS 27 Golden Gate
- Record system audio on macOS 12 to 26 (Monterey to Tahoe)
- Record your voice and the computer's sound together
- QuickTime screen recording with audio
- Sleekshot for Mac: system audio and microphone, free
- No sound in your Mac screen recording? Check these in order
To screen record on a Mac with audio from your microphone, press ⌘ + ⇧ + 5, click Options and pick a mic under Microphone. That works on every recent macOS. The Mac's own sound is another matter. A YouTube video or the voices on a call count as system audio, and Apple's tools record it only in macOS 27 Golden Gate or later, through Options → Include System Audio.
On macOS 12 Monterey through macOS 26 Tahoe, ⌘⇧5 and QuickTime Player record a microphone and nothing else, which is why so many recordings come out silent. On macOS 13 Ventura to 26, use an app that captures system audio, such as the free Sleekshot for Mac or OBS Studio, or add a virtual audio driver like BlackHole. On Monterey, BlackHole is the one that works. To check your version, choose Apple menu → About This Mac.
Mac screen recording with sound: what works on your macOS
The built-in tools are enough for your voice on any version, and for the Mac's own sound only on macOS 27.
| Method | macOS | Microphone | System audio | Cost |
|---|---|---|---|---|
| Screenshot toolbar (⌘⇧5) | 12 to 26 | Yes | No | Free, built in |
| Screenshot toolbar (⌘⇧5) | 27 Golden Gate | Yes | Yes, Include System Audio | Free, built in |
| QuickTime Player | Same as ⌘⇧5 | Yes | Only on macOS 27 | Free, built in |
| Sleekshot for Mac | 13 Ventura or later | Yes | Yes | Free, Mac App Store |
| OBS Studio | 13 or later for system audio | Yes | Yes | Free, open source |
| ⌘⇧5 or QuickTime with BlackHole | Any recent version, including 12 | Only with an extra Aggregate Device | Yes | Free, donation optional |
On macOS 27, stay with the built-in toolbar. On macOS 13 to 26, a free app is the easier route if you record often, and BlackHole suits people who want to keep using Apple's tools. On macOS 12 Monterey, use BlackHole: Sleekshot records only on macOS 13 or later, and OBS captures desktop audio from macOS 13. The full walkthrough of each recording method is in our guide on how to screen record on a Mac.
Record your voice: microphone only (any macOS)
Your microphone works with the Screenshot toolbar on every recent macOS, as long as you choose it before you click Record.
- Press ⌘ + ⇧ + 5.
- Click Record Entire Screen or Record Selected Portion. On macOS Tahoe 26 or later, there's also Record Selected Window.
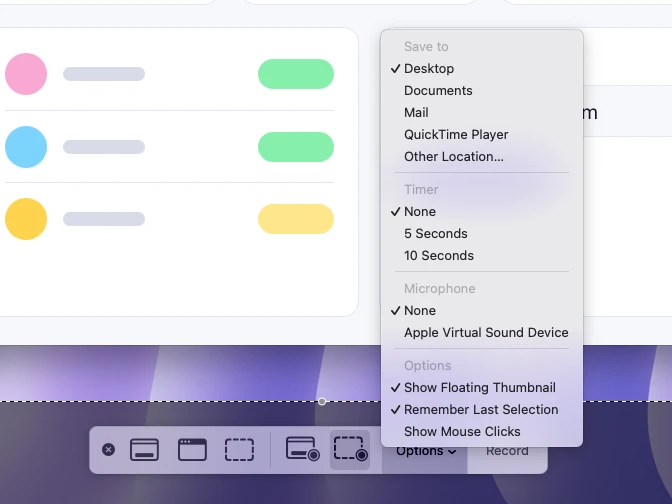
- Click Options. Under Microphone, choose the mic you'll talk into, for example the MacBook's built-in microphone or a USB mic, so a checkmark appears next to it. None means the video will have no sound.
- Click Record.
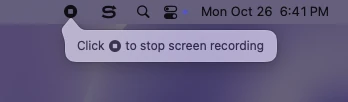
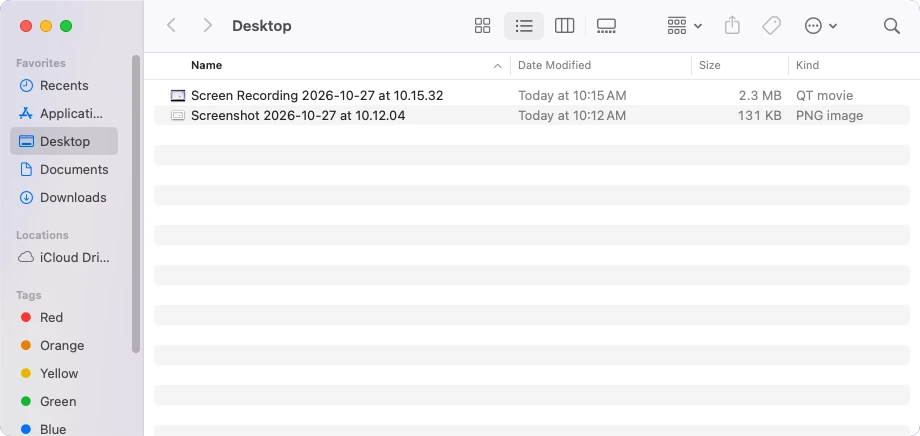
- To stop, click the Stop button in the menu bar or press ⌘ + Control + Esc. The video lands on your desktop as "Screen Recording
at
A mic next to your speakers will catch some of what the Mac plays. That copy travels through the air, so it comes out thin and echoey, with every keyboard click on top. System audio is taken directly from the Mac, so it sounds like the original.
If the stop step gives you trouble, see how to stop a screen recording on a Mac.
Record the Mac's sound on macOS 27 Golden Gate
macOS 27 Golden Gate added Include System Audio to the Options menu, so the built-in toolbar can now record what your Mac plays. Apple lists the option for macOS 27 or later only.
- Press ⌘ + ⇧ + 5 and choose what to record.
- Click Options and choose Include System Audio.
- To add your voice, also pick a microphone under Microphone. For the Mac's sound alone, choose None.
- Click Record, play your video or join the call, and stop with the menu bar button or ⌘ + Control + Esc.
While system audio is being recorded, macOS can show a purple dot to the right of Control Center in the menu bar. Only one privacy dot appears at a time (orange is the microphone), so open Control Center if you want to see exactly which apps are using the mic or system audio.
Record system audio on macOS 12 to 26 (Monterey to Tahoe)
On macOS 26 and earlier, ⌘⇧5 and QuickTime Player can't record system audio at all. You can get around it in two ways: with a recording app that captures the sound itself (macOS 13 Ventura or later), or with a virtual audio driver that passes the Mac's sound to Apple's tools as if it came from a microphone. On macOS 12 Monterey, only the driver works.
Option 1: a recording app with a system audio switch
Sleekshot for Mac (free, macOS 13 Ventura or later, steps below) has a system audio button on its recording bar. OBS Studio, the free open-source recorder, captures desktop audio on macOS 13 Ventura or later. In OBS 30 and newer, add a macOS Audio Capture source and choose all desktop audio or a single app, as the OBS macOS audio guide describes. Expect some setup in OBS: scenes, sources and an audio mixer come before your first recording.
Option 2: the BlackHole virtual audio driver
BlackHole is a free, open-source virtual audio driver for macOS (GPL-3.0, with an optional donation). It adds a fake audio device that hands the Mac's sound to any app that records a microphone, including ⌘⇧5 and QuickTime. It works, but you'll rewire your sound output every time you record.
- Install BlackHole 2ch from existential.audio or with Homebrew:
brew install blackhole-2ch. Restart if the installer asks you to. - Open Audio MIDI Setup (Applications → Utilities), click + and choose Create Multi-Output Device. Tick your speakers or headphones and BlackHole 2ch. The BlackHole guide on GitHub explains the device order and drift correction settings.
- Choose the Multi-Output Device as your sound output in System Settings → Sound → Output. You still hear everything, and BlackHole gets a copy.
- Press ⌘ + ⇧ + 5, choose Options → Microphone → BlackHole 2ch, then record.
- When you're done, set the sound output back to your speakers or headphones.
BlackHole takes the microphone slot in the Options menu, so this setup records the Mac's sound without your voice. For both, you'd build an Aggregate Device in Audio MIDI Setup that combines your mic and BlackHole. If you record more than now and then, an app with a system audio switch is far less fiddly.
Record your voice and the computer's sound together
Narrated tutorials and recorded calls need both sources at once. Every method above can do it, with different amounts of setup.
| Method | How to record your voice and the Mac's sound |
|---|---|
| ⌘⇧5 on macOS 27 | Pick a microphone and choose Include System Audio in the same Options menu |
| Sleekshot for Mac | Turn on both the microphone and system audio buttons |
| OBS Studio | Keep Mic/Aux and the macOS Audio Capture source unmuted, and watch both meters in the Audio Mixer |
| BlackHole | Record from an Aggregate Device that combines your mic and BlackHole 2ch |
Wear headphones when you record both. With speakers, the mic hears the Mac's sound a second time and the video gets an echo. Apple's own advice for QuickTime is the same: if you get audio feedback, lower the volume or use headphones with a microphone. And if you're recording a call, tell the other people first. In many places that's a legal requirement.
QuickTime screen recording with audio
QuickTime Player records sound the same way as ⌘⇧5, because on current macOS it opens the same Screenshot toolbar. Your mic works on any version, and system audio only on macOS 27.
- Open QuickTime Player from the Applications folder.
- Choose File → New Screen Recording or press Control + ⌘ + N.
- Click Options, choose a microphone and, on macOS 27, Include System Audio.
- Click Record. Stop with the menu bar button or ⌘ + Control + Esc, and QuickTime opens the recording right away.
If you see a Screen Recording window instead of the toolbar, click the arrow next to the Record button to choose the microphone. Either way, QuickTime on macOS 26 or earlier records your voice only.
Sleekshot for Mac: system audio and microphone, free
Sleekshot for Mac is a free menu bar app for screenshots and screen recording (Mac App Store; screenshots on macOS 12 or later, recording on macOS 13 Ventura or later). It records an area, a window or the full screen with system audio and your microphone, and there's no account to create.
- Press ⌘ + ⇧ + 2 and select what to record: drag over an area, click a window or press ⌘ + A for the full screen.
- Click the record button (the camera icon) on the action bar under the selection, or press V.
- Click the gear on the bar and turn on Microphone and System audio. Camera, Highlight mouse clicks, Face mask and Quality are in the same settings.
- Press ⌘ + R or click the red record button. A red dashed outline marks the recorded area, and the recording bar shows a timer and a pause button.
- When you're done, click save or copy on the recording bar. Save asks where to put the file, suggests the Movies folder and lets you pick MP4 or GIF in the Format menu. A copied recording pastes straight into a chat.
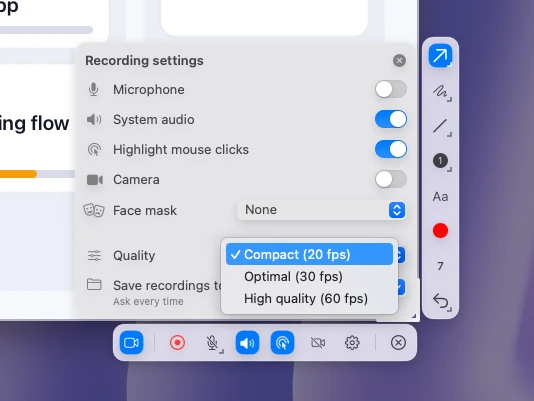
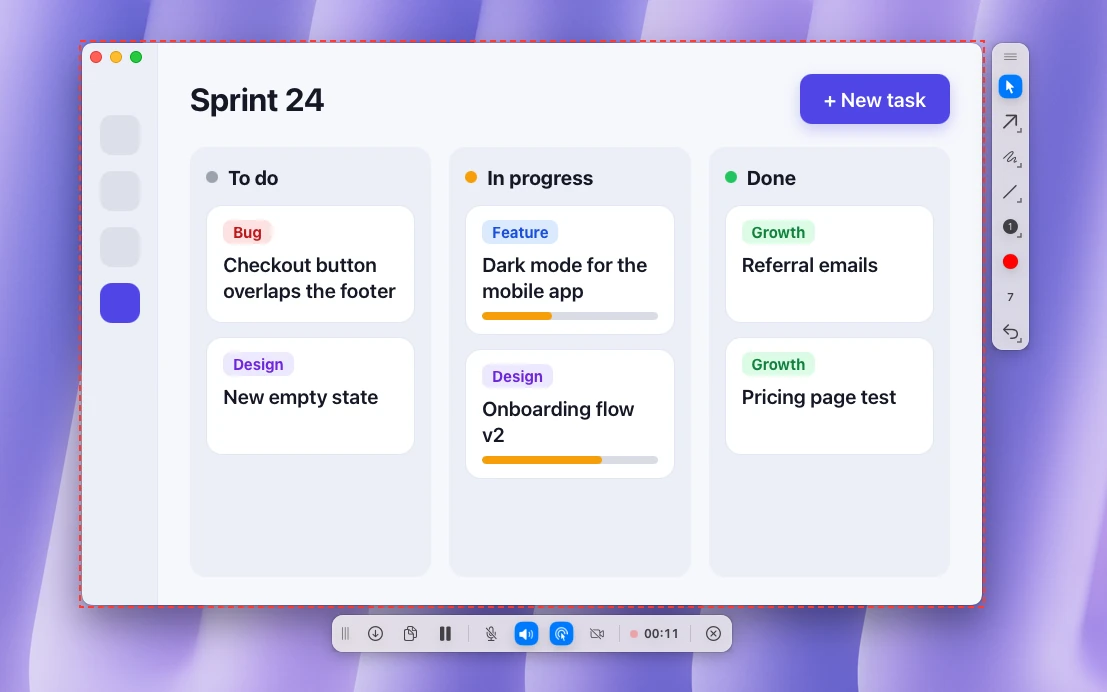
Check the recording bar before you talk for ten minutes: a crossed-out microphone icon means your voice isn't going into the video. Recording and system audio need macOS 13 Ventura or later. On macOS 12 Monterey, Sleekshot takes screenshots only, and its Settings say "Screen recording requires macOS 13 Ventura or later."
Quality presets are Compact (20 fps), Optimal (30 fps) and High quality (60 fps). You can pause, show your webcam in the corner or wear a face mask that follows your expressions. There's no time limit and no watermark. Sleekshot has no trimming or video editor, and it's only on the Mac App Store. More on the free Mac app.
No sound in your Mac screen recording? Check these in order
Work down this list from the top. Each check takes less than a minute.
- The microphone was set to None. Press ⌘⇧5, open Options and make sure a mic has a checkmark under Microphone.
- You wanted the Mac's sound on macOS 26 or earlier. The built-in tools can't record it there, whatever the settings. Use an app or BlackHole as described above.
- The wrong microphone is selected. Open System Settings → Sound → Input, speak and watch the input level move. Then choose the same device in Options → Microphone.
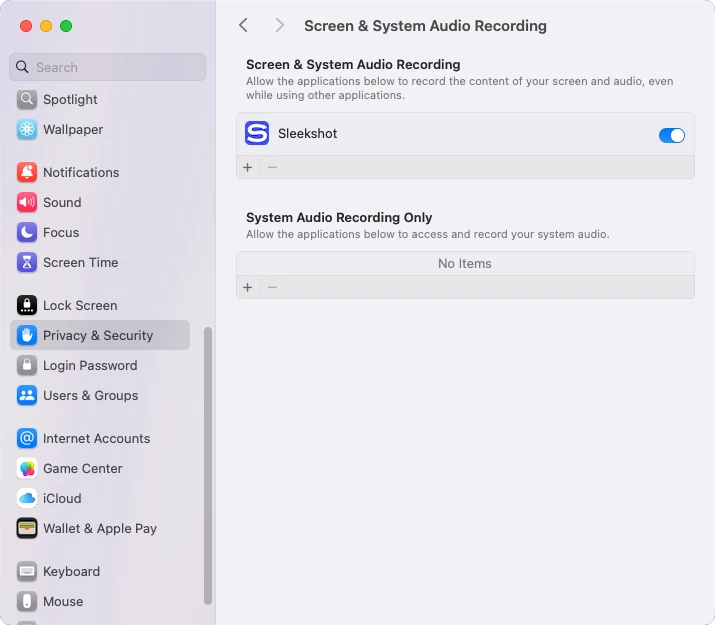
- A third-party recorder has no permission. For Sleekshot, OBS or any other app, open System Settings → Privacy & Security → Screen & System Audio Recording and turn the app on. The list lets you allow screen and audio, or audio only. Check Privacy & Security → Microphone too, then quit and reopen the app.
- Bluetooth headphones or AirPods sound bad. While their mic is in use, Bluetooth drops to a lower-quality mode and both your voice and the playback suffer. Choose the built-in microphone and keep the AirPods for listening.
- The sound itself was muted. A muted browser tab, a video player on mute or a call with the speaker off leaves nothing to record. With BlackHole, also check that the Multi-Output Device is still your sound output.
Recorded fine but can't find the file? See where screen recordings go on a Mac. On a Windows PC, the switches are different: how to screen record with audio on Windows.
Frequently asked questions
Why is there no sound in my Mac screen recording?
Can QuickTime record internal audio on a Mac?
How do I record internal audio on a Mac without installing anything?
How do I record only the computer's sound, without my voice?
Is Sleekshot for Mac free for recording with sound?
Why does my voice sound bad when I record with AirPods?
Sleekshot Team
We build Sleekshot, a free screenshot and screen recording app for Windows and Mac. Every guide is checked on current Windows 11, Windows 10 and macOS builds.
Also available in: Deutsch Français Español Italiano Русский ភាសាខ្មែរ Bahasa Indonesia 简体中文 日本語