How to Record Your Screen with a Webcam on Windows and Mac
 By Sleekshot Team
12 min read
Short answer
Snipping Tool, Xbox Game Bar and the Mac's built-in recorder (Command + Shift + 5) can't add your webcam to a screen recording, so you need a screen recorder that can. In Sleekshot for Windows (free), press PrtSc, select the area, press V, turn on the camera and press Ctrl+R, and your face appears in a round bubble you can drag anywhere. Sleekshot for Mac (free) records your webcam in the corner and can swap your face for an animated mask. Clipchamp on Windows 11 and OBS Studio also record the screen and camera together.
On this page
- Screen recorders with a webcam for Windows and Mac, compared
- Method 1: Sleekshot for Windows (round webcam bubble, free)
- Method 2: Clipchamp (comes with Windows 11)
- Method 3: OBS Studio (full control over the layout)
- Method 4: Loom (record and share a link)
- How to record your screen with a webcam on a Mac
- Where to put your webcam and how big to make it
- Webcam not showing in the recording? Quick fixes
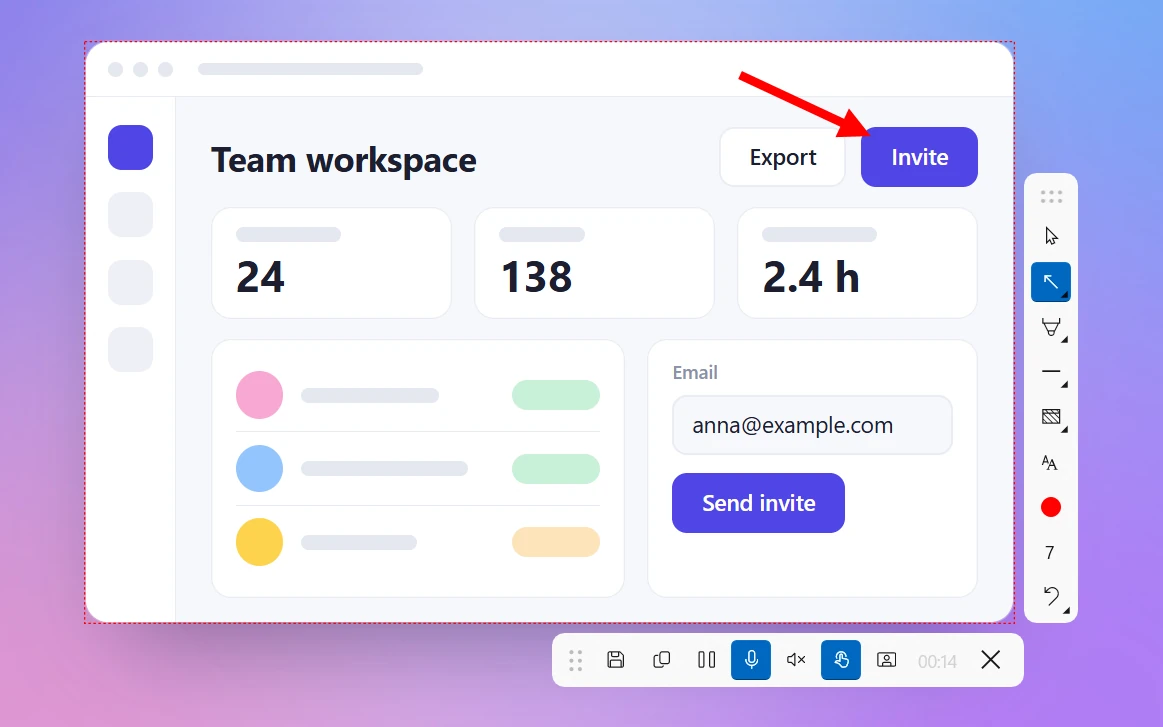
To record your screen with a webcam on Windows or a Mac, you need a screen recorder that can add your camera to the video. The built-in tools record only the screen: Snipping Tool and Xbox Game Bar on Windows, the Screenshot toolbar (⌘ + ⇧ + 5) and QuickTime Player on a Mac. In Sleekshot, a free screen recorder for Windows 10 and 11, press PrtSc, select the area and press V. Then turn on the camera and press Ctrl + R. Your face shows up in a round bubble in the corner of the MP4. Sleekshot for Mac starts with ⌘ + ⇧ + 2 and can also put an animated mask over your face.
Clipchamp (included with Windows 11), OBS Studio and Loom do the same job, each with its own trade-offs. Below are the steps for each tool, a section for Mac users and a comparison of the limits. Then comes the part people skip: where to put your face, how big to make it and why the camera stays black.
Screen recorders with a webcam for Windows and Mac, compared
| Tool | Price (October 2026) | How the webcam looks | Main limits | Best for |
|---|---|---|---|---|
| Sleekshot for Windows | Free, no account | Round bubble you drag anywhere, 120–800 px | MP4 only, no editor | Tutorials, bug reports, quick video updates |
| Sleekshot for Mac | Free, no account (Mac App Store) | Webcam in the corner, optional face masks | MP4 or GIF, no editor | Tutorials and updates, with or without your real face |
| Clipchamp | Free, comes with Windows 11 | A camera clip you move around in the editor | 30 minutes per recording | Videos you want to edit before sharing |
| OBS Studio | Free, open source | Any size or shape, with filters | Takes time to set up | Long recordings, streaming, custom layouts |
| Loom | Free Starter plan; paid from $18 per user/month | Camera bubble | Free plan: 5-minute clips, 25 videos, 720p, account needed | Sharing a link with teammates |
| Snipping Tool, Xbox Game Bar | Built into Windows | No webcam | Screen only | Recordings without your face |
| ⌘ + ⇧ + 5, QuickTime Player | Built into macOS | Only a QuickTime camera window kept on top | No webcam option in the recorder | A Mac without extra apps |
OBS Studio and Loom also have Mac versions. Clipchamp in this guide is the app that comes with Windows 11.
In short: use Sleekshot to add your face in a few key presses, and Clipchamp if you'll edit the video anyway. OBS Studio suits hour-long sessions or a custom layout. Loom works for teams that share videos as links. On a Mac, Sleekshot for Mac adds your webcam or a face mask in a few clicks, and a floating QuickTime window helps when you can't install anything.
Method 1: Sleekshot for Windows (round webcam bubble, free)
Sleekshot for Windows is a free screenshot and screen recording app for Windows 10 (1809 or later) and 11. It adds a round webcam bubble to the video, which you can drag anywhere. It also records your microphone and computer sound and can highlight your mouse clicks. There's no watermark, no time limit and no account.
- Press PrtSc, Sleekshot's default shortcut. The screen dims.
- Drag over the area you want to record, click a window or press Ctrl + A for the whole monitor.
- Press V (Screen recorder mode). The recording toolbar appears.
- Click the camera button. A round preview of your webcam appears.
- Drag the bubble to a corner where it doesn't cover anything important. Set its size anywhere from 120 to 800 px.
- Pick your microphone. The live level meter shows whether it hears you. Turn on system audio or click highlights if you need them.
- Press Ctrl + R (Record). When you're done, click Save to file. Or click Copy to clipboard and paste the MP4 straight into a chat or an email.
Everything is on one toolbar, so you see what goes into the video before you start: camera, microphone, system audio and click highlights.
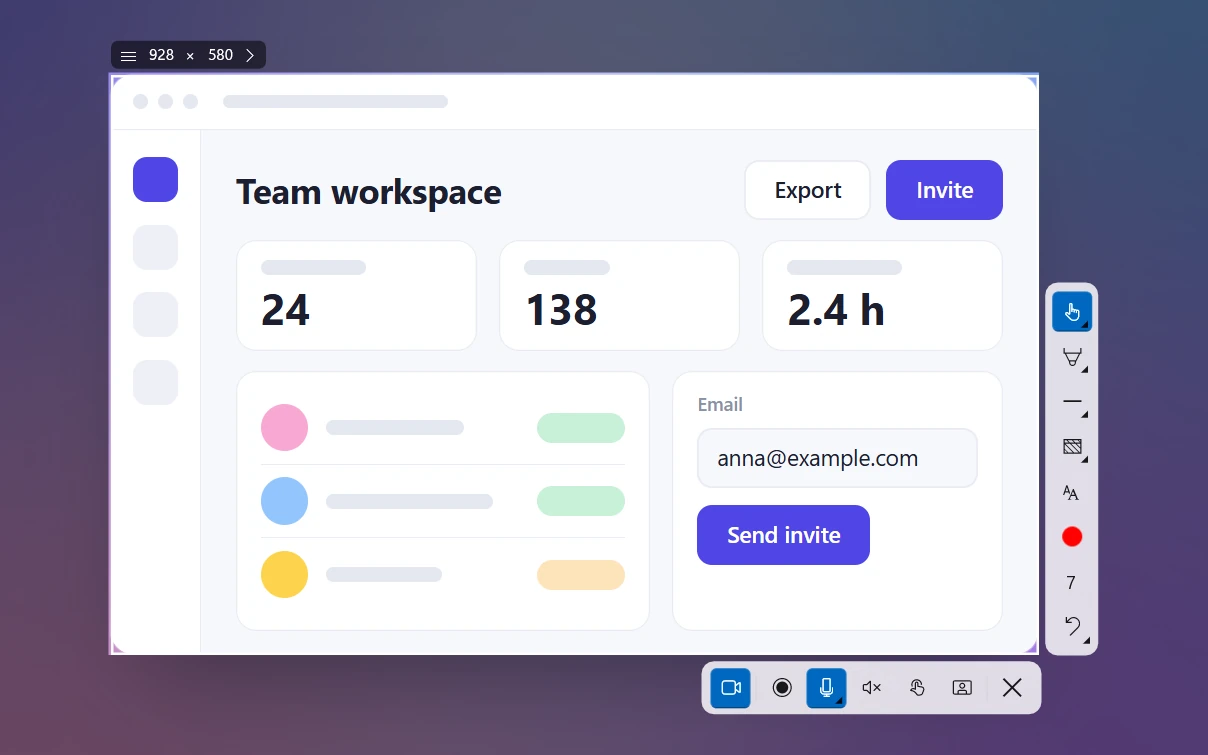
You can also draw arrows and boxes on the screen while you record. That works well with a webcam in tutorials: you talk, point and circle the button in one take. Sleekshot keeps its own toolbars out of the video.
The limits on Windows: the webcam is always a round bubble, the video is MP4 only and there's no trimming or editor. To cut the start or end, open the MP4 in Clipchamp or any video editor. Sleekshot for Mac has its own section below.
More on the Sleekshot screen recorder page.
Method 2: Clipchamp (comes with Windows 11)
Clipchamp is Microsoft's video editor, and it comes with Windows 11. Its screen and camera recorder is free, adds no watermark and records up to 30 minutes at a time. For longer videos, you make several recordings.
- Open Clipchamp from the Start menu and create a new video.
- Choose Record & create in the sidebar, then the screen and camera recorder.
- Pick your microphone and camera.
- Choose what to share: a browser tab, a window or the entire screen. Then start recording.
- Stop, watch the take and save it to the timeline.
- Move and resize the camera clip so it doesn't cover the screen, then export the video.
The upside is that the editor sits right next to the recorder. You can trim and add titles and captions before you export. The downside is speed. Every recording goes through the editor and an export, which is a lot of steps for a one-minute update to a coworker.
Method 3: OBS Studio (full control over the layout)
OBS Studio is a free, open-source app for recording and streaming on Windows, macOS and Linux. It treats the screen and the webcam as separate sources, so you can put the camera anywhere, at any size. It saves the layout as a scene for next time.
- Install OBS Studio from obsproject.com and run the auto-configuration wizard for recording.
- Under Sources, click + → Display Capture and choose your monitor.
- Click + again → Video Capture Device and pick your webcam.
- Drag the camera to a corner of the preview and resize it with its red handles. To crop it, hold Alt while you drag an edge.
- Check the Audio Mixer. Your microphone meter should move when you speak.
- Click Start Recording, then Stop Recording. By default, the file goes to your
Videosfolder.
For a round camera, right-click the camera source → Filters → + → Image Mask/Blend and pick a black-and-white circle image as the mask. You only do this once per scene. OBS gives you the most control of any tool here, but it takes the longest to set up.
Method 4: Loom (record and share a link)
Loom records your screen, your camera or both. It uploads the video and gives you a link as soon as you stop. There are apps for Windows 10 (64-bit) and 11 and for Mac, and you need an account.
As of October 2026, the free Starter plan gives you 25 videos, recordings up to 5 minutes and quality up to 720p. Paid plans remove the limits and start at $18 per user per month. Loom fits teams that already share updates as links. If you just want a quick MP4 on your PC without an account, a desktop recorder is simpler.
How to record your screen with a webcam on a Mac
As of October 2026 (macOS 27 Golden Gate), the Mac's built-in recorder (⌘ + ⇧ + 5) and QuickTime Player have no webcam option for screen recordings. To get your face into the video, use a recorder with a camera setting, such as Sleekshot for Mac or OBS Studio. If you can't install anything, a QuickTime camera window kept on top of the screen comes close.
Sleekshot for Mac: webcam in the corner or a face mask
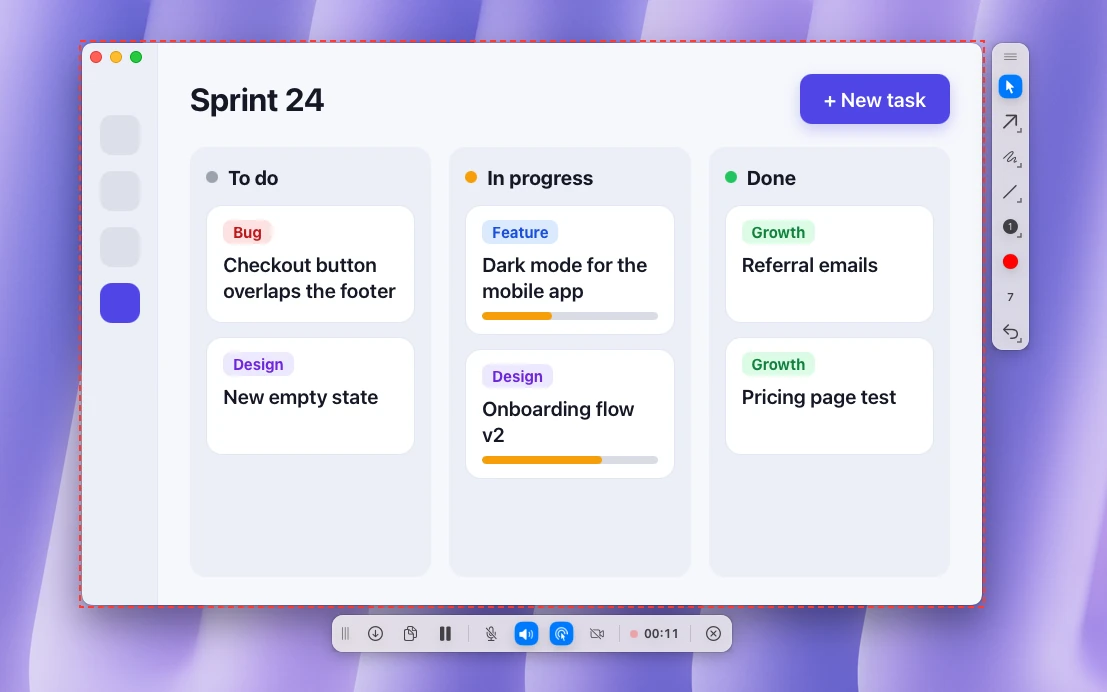
Sleekshot for Mac is a free menu bar app for screenshots and screen recording (Mac App Store; screenshots on macOS 12 or later, recording on macOS 13 Ventura or later). It records the area, window or full screen you select to MP4 with your webcam in the corner, your microphone and system audio. You see the camera before the recording starts, and you don't need an account.
- Press ⌘ + ⇧ + 2, Sleekshot's default shortcut. The screen freezes.
- Drag over the area you want to record, click a window or press ⌘ + A for the full screen.
- Press V to switch to video mode.
- Turn on the camera on the recording bar. Your webcam appears in the corner. Turn on the microphone, system audio and click highlight if you need them.
- Press ⌘ + R or click the record button to start. A red dashed outline marks the recorded area, and the bar shows a timer. You can pause and resume at any point.
- When you stop, Sleekshot asks where to save the video (the Movies folder by default) and lets you pick MP4 or GIF. Or copy it and paste it into a chat.
If you'd rather not show your face, pick one of 10 face masks: a cat, a dinosaur, a horse, an alien, a strawberry, a superhero, a diva, a dude, a granny or a frog. The mask blinks, winks, smiles and raises its eyebrows with you, and its mouth opens when yours does. Tick Keep real background to keep your room behind the mask; otherwise you get a themed background. The masks run on your Mac and need no internet connection.
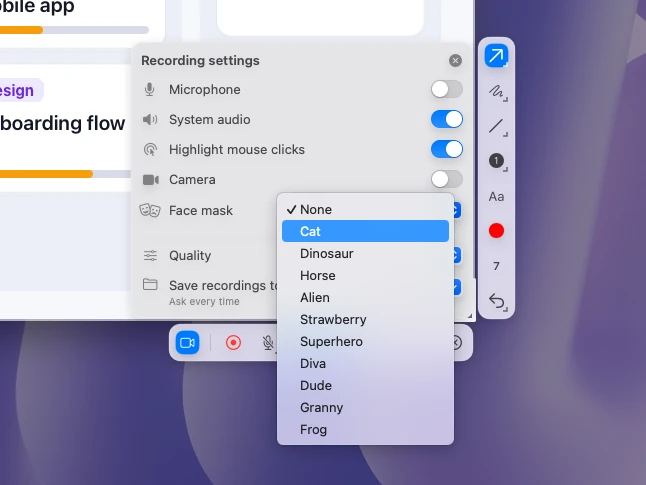
While you record, you can draw arrows and shapes on the live screen, and clicks get highlighted if you turn that on. The settings offer 20, 30 or 60 fps. The limits: one area at a time, no trimming or video editor, and the app is only on the Mac App Store.
Every way to record on a Mac, with and without Sleekshot, is in how to screen record on a Mac. More about the app is on the Sleekshot for Mac page.
Without extra apps: a QuickTime camera window on top
QuickTime Player can show your camera in a window that stays in front of other windows. If that window is inside the area you record, your face ends up in the video.
- Open QuickTime Player and choose File → New Movie Recording. A window with your camera appears. Don't click its record button.
- Choose View → Float on Top so the camera window stays in front.
- Make the window smaller and drag it to a corner of the screen.
- Press ⌘ + ⇧ + 5 and choose Record Entire Screen or Record Selected Portion. Make sure the camera window is inside the area, then click Record.
- To stop, click the Stop button in the menu bar or press ⌘ + ⌃ + Esc. The .mov file is saved to your desktop.
The camera stays a plain rectangle, and QuickTime's controls appear when the pointer moves over it. Some apps can still cover the window, so make a short test recording first. Computer sound is only an option on macOS 27 Golden Gate or later (Options → Include System Audio). Earlier versions record just the microphone.
Presenter Overlay works only in video calls
Presenter Overlay shows you on top of the screen you share in a video call, either as a small movable bubble or as a large view with the screen next to you. It needs macOS Sonoma 14 or later on a Mac with Apple silicon, and it works in FaceTime and other video apps that support it. The Screenshot toolbar has no such option, so Presenter Overlay won't add your face to a regular screen recording.
Where to put your webcam and how big to make it
A webcam helps when it supports what's on screen, not when it covers it. These rules work for most tutorials.
- Pick the empty corner. Bottom right is the usual spot, but look at your demo first. If you'll click buttons or read messages down there, use bottom left. Do a 10-second test and watch where your mouse goes.
- Keep it small. About 10–15% of the video width is enough to see your face on a phone: roughly 200–300 px in a 1920 × 1080 recording. That's well within the 120–800 px range of Sleekshot for Windows.
- Put the camera at eye level. A laptop camera looking up at your chin is the most common reason a webcam shot looks off. Set the laptop on a few books or use an external webcam on top of the monitor.
- Put the light in front of you. Face a window or put a lamp behind the monitor. A bright window behind you turns your face into a silhouette.
- Look at the lens when you make an important point, and at the screen while you work. Viewers are fine with both.
- Wear headphones if you record system audio and your microphone together. Otherwise PC sound leaks into the mic. More in how to screen record with audio.
- Record a smaller area instead of the whole 4K desktop, so text stays readable next to your face. See how to record part of the screen.
Webcam not showing in the recording? Quick fixes
- Another app is using the camera. Close Teams, Zoom, the Camera app or a browser tab with a video call. Then turn the camera on again in your recorder.
- Windows is blocking the camera. Open Settings → Privacy & security → Camera (Windows 10: Settings → Privacy → Camera). Turn on camera access in general, for apps and for desktop apps.
- macOS is blocking the camera. Open System Settings → Privacy & Security → Camera and turn on the app you record with. Quit and reopen the app after you change it.
- The privacy shutter is closed. Many laptops and webcams have a sliding cover or a camera on/off key. Check both before you dig into settings.
- Windows doesn't see your external webcam. Plug it into another USB port and look for it under Cameras in Device Manager.
- Your face covers the content. Stop, move the bubble or camera source to another corner and record again. That's faster than fixing it in an editor later.
For everything else about recording on Windows, like shortcuts, quality settings and where files go, see our main guide on how to screen record on Windows. Our list of free screen recorders without a watermark compares more tools.
Frequently asked questions
Can I record my screen and webcam at the same time without extra software?
What is the best free screen recorder with a webcam?
How do I make my webcam a circle in a screen recording?
Can I wear a face mask instead of showing my face in a screen recording?
Why is my webcam black or missing in the recording?
Can I record only my webcam, without the screen?
Sleekshot Team
We build Sleekshot, a free screenshot and screen recording app for Windows and Mac. Every guide is checked on current Windows 11, Windows 10 and macOS builds.
Also available in: Deutsch Français Español Italiano Русский ភាសាខ្មែរ Bahasa Indonesia 简体中文 日本語