How to Combine Two Screenshots Into One Image (Windows 11 & 10)
 By Sleekshot Team
7 min read
By Sleekshot Team
7 min read
Short answer
If both things are on screen at the same time, snap the two windows side by side (Win + Left, Win + Right) and take one screenshot across both. If you already have two image files, open the first in Paint and drag the canvas edge to make room. Paste the second with Ctrl + V, drag it into place and save as PNG. PowerPoint, ShareX and ImageMagick handle bigger layouts and lots of files.
On this page
- Quick comparison: 6 ways to combine screenshots
- Method 1: Take one screenshot of both areas (fastest)
- Method 2: Combine screenshots in Paint (built into Windows)
- Method 3: PowerPoint for three or more screenshots
- Method 4: ShareX Image combiner (free, lots of files)
- Method 5: ImageMagick for lots of files and scripts
- Method 6: Online tools
- What doesn't work (so you don't waste time)
- Tips for a clean combined screenshot
The fastest way to combine two screenshots into one is to skip merging altogether. If both things fit on screen at once, snap the two windows side by side with Win + ← and Win + →. Then take one screenshot across both. If you already have two image files, Paint (built into Windows) does it in about a minute. Open the first image, drag the canvas edge to make room, paste the second with Ctrl + V and save.
Combined screenshots work well for before-and-after comparisons, two steps of the same process, or an error message next to the setting that caused it. One image is easier to follow than two attachments, and the order stays the way you meant it. Below are six ways to do it, from no effort at all to scripts for lots of files, plus the apps that look like they should work but don't.
Quick comparison: 6 ways to combine screenshots
| Method | Works with files you already have | Cost | Effort | Best for |
|---|---|---|---|---|
| One screenshot across both | Indirectly (open them side by side first) | Free | Lowest | Things on screen at the same time |
| Paint | Yes | Built into Windows | Low | Two images side by side or stacked |
| PowerPoint | Yes | Microsoft 365 / Office | Medium | Three or more images with labels |
| ShareX Image combiner | Yes | Free, open source | Low once installed | Lots of images in a row or column |
| ImageMagick | Yes | Free, open source | Command line | Lots of files and scripts |
| Online tools | Yes | Free plans | Low, but uploads your files | Nothing to install, ready-made layouts |
Method 1: Take one screenshot of both areas (fastest)
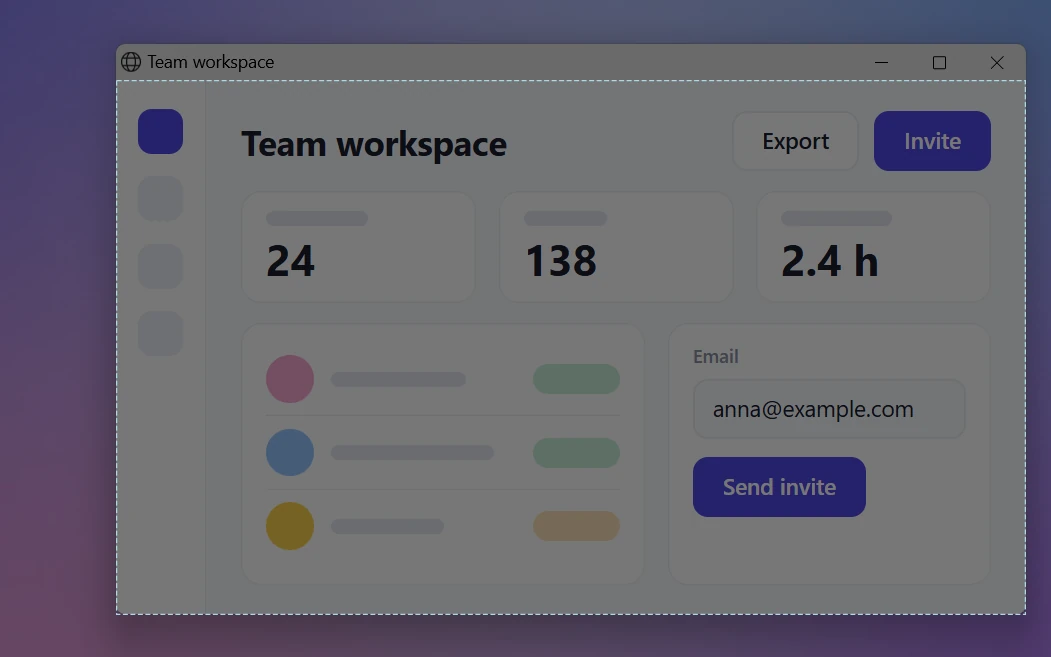
Often you don't need to merge two images at all. Put both things on screen and take one screenshot. The result is sharp, lined up and ready in seconds.
- Arrange the windows. Click the first window and press Win + ←. Click the second and press Win + →. In Windows 11, you can also hover over a window's maximize button and pick a snap layout.
- For two parts of one long page, zoom out in the browser with Ctrl + - until both parts fit on screen.
- Take one screenshot across both. With Sleekshot, press PrtSc and drag across both windows. Snipping Tool works too: Win + Shift + S, rectangle mode.
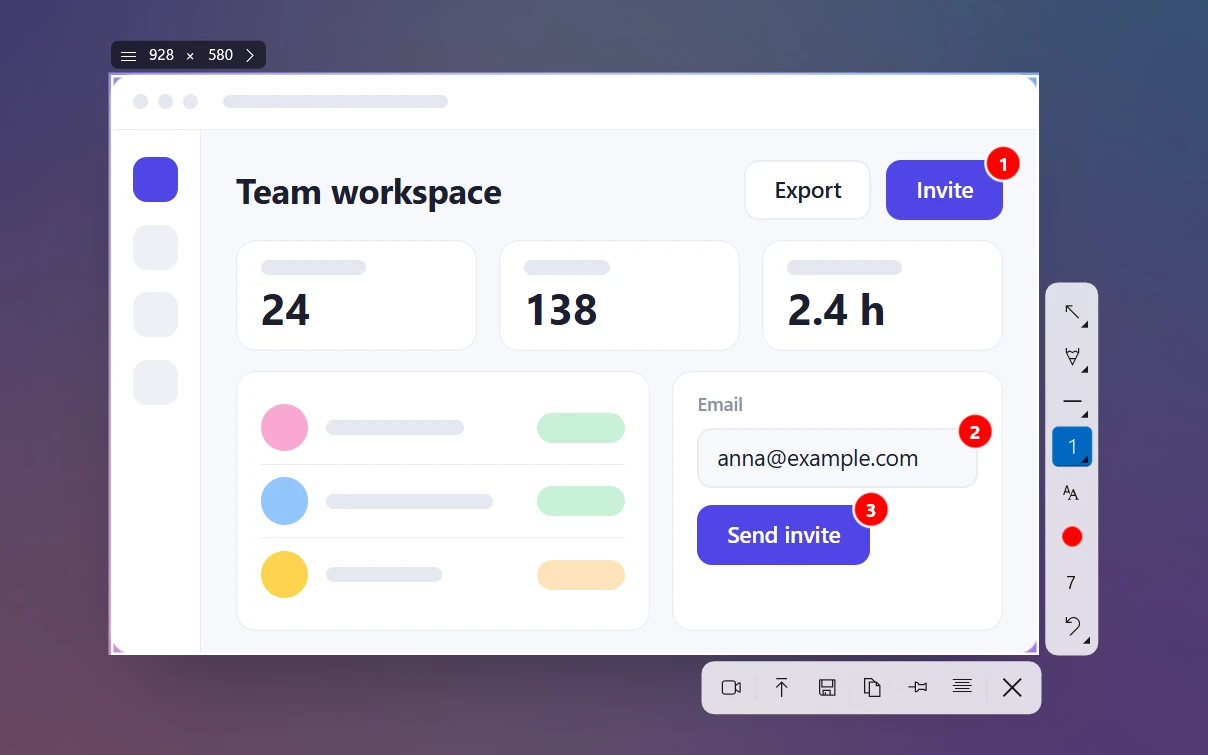
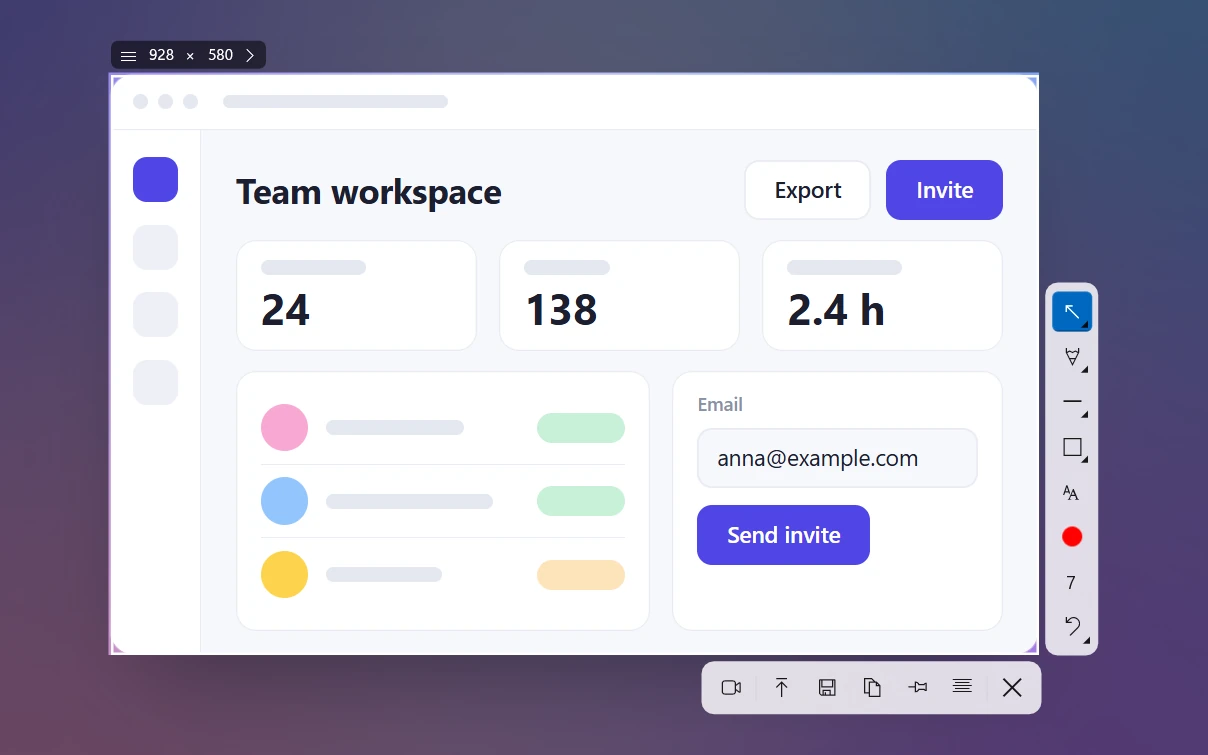
- Show the order. In Sleekshot, press S and click to add step numbers 1 and 2, or draw an arrow (1) from cause to effect. Then copy (Ctrl + C), save (Ctrl + S) or get a link (Ctrl + U).
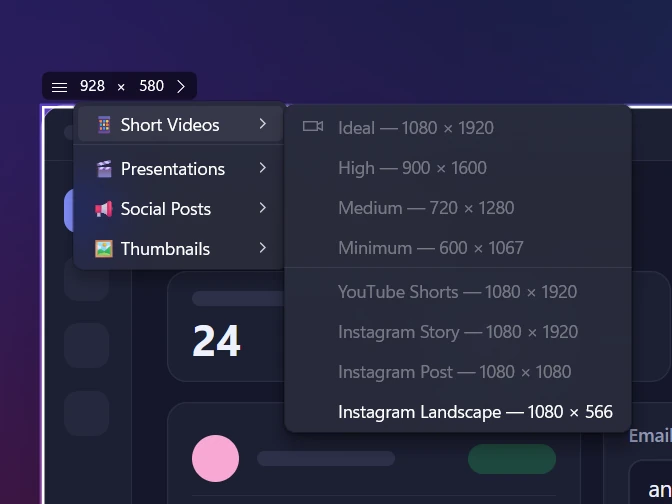
Need a set size, like 1200 × 630 for a social post or 1920 × 1080 for a slide? In Sleekshot, click the W × H size box and type the size, or pick a ready-made size from the menu. Then move the selection over both windows. More on ready-made sizes.
Already have two saved images? Open each one in Photos, snap the two windows side by side, set both to the same zoom and take a screenshot across them. The catch: the screenshot is only as sharp as what's on screen. If an image is shown smaller than its real size, the combined version loses detail. For full resolution, use Paint.
What Sleekshot can't do here: it doesn't take scrolling screenshots or open saved image files. If something won't fit on one screen, zoom out or merge the files with one of the methods below. If you only need a screenshot of a single window, just click the window.
Method 2: Combine screenshots in Paint (built into Windows)
Paint is on every Windows PC, and it keeps your screenshots at full resolution. Here's how to put them side by side:
- Right-click the first screenshot and choose Open with → Paint.
- Make room. Drag the small handle on the right edge of the white canvas to the right, until it's about twice as wide. The status bar at the bottom shows the canvas size in pixels.
- Open the second screenshot in another Paint window. Press Ctrl + A, then Ctrl + C.
- Switch back to the first window and press Ctrl + V. The pasted image appears in the top-left corner, still selected.
- Drag it by the middle into the empty space on the right. If you click outside it too early, it's stuck in place. Press Ctrl + Z and paste again.
- Trim any leftover white space by dragging the canvas handles back in.
- Click File → Save as and choose PNG.
To stack the images vertically, drag the bottom handle down in step 2 and put the second image below the first. Vertical stacks are easier to read on phones and in narrow chat windows.
If the two screenshots aren't the same height, don't stretch one of them. Stretching makes small text blurry. Leave a white strip instead, or only shrink the bigger image. With the pasted image selected, press Ctrl + W to resize it by percentage.
Method 3: PowerPoint for three or more screenshots
PowerPoint is handy when you want a grid, captions or arrows between screenshots, like a three-step how-to for a coworker.
- Create a blank slide (Home → Layout → Blank).
- Go to Insert → Pictures → This Device and select all your screenshots with Ctrl + click.
- Arrange them. Use Picture Format → Align (Align Top, Distribute Horizontally) to line them up.
- Add captions or arrows if you like. Then select everything and press Ctrl + G to group it.
- Right-click the group, choose Save as Picture and pick PNG.
Check the saved image at 100% zoom. If the text looks softer than in your originals, PowerPoint saved it at a lower resolution. Paint or ShareX will give you a sharper result.
Method 4: ShareX Image combiner (free, lots of files)
ShareX, the free open-source screenshot app, has an Image combiner under Tools. Add your screenshots and choose horizontal or vertical. It joins them into one image you can save. It's the quickest option if you often combine five or ten screenshots, and it works without the internet.
Method 5: ImageMagick for lots of files and scripts
If you're comfortable with the command line, try ImageMagick (free, from imagemagick.org). It combines images in one line and doesn't change the pixels unless you ask it to:
magick before.png after.png +append side-by-side.png
magick step1.png step2.png step3.png -append steps.png
magick a.png b.png -background white -gravity center +append centered.png
+append puts images side by side, and -append stacks them. -gravity center centers images of different sizes on a white background instead of lining them up at the top left.
Method 6: Online tools
Browser editors like Canva or Photopea, and simple "merge images" sites, let you drop two files onto a canvas without installing anything. Some have ready-made layouts. The downsides: most of them upload your images, and some compress the result or add a watermark on free plans. You also need the website to be up. That's fine for a meme or a public product photo, not for a screenshot of an invoice or an internal tool.
What doesn't work (so you don't waste time)
- Snipping Tool edits one screenshot at a time. There's no way to add a second image.
- Photos in Windows 11 is a viewer with basic edits like crop and rotate. It can't merge two pictures.
- Clipchamp can put pictures side by side, but it saves a video, not an image.
Tips for a clean combined screenshot
- Take both at the same zoom level so the text in both halves is the same size.
- Leave a gap or a thin divider (10–20 px) so people see two images, not one confusing one.
- Number the parts when the order matters. Our guide to step-by-step screenshots shows how to make a sequence easy to follow, and annotating a screenshot covers arrows and labels.
- Hide private data before you merge. It's easier to blur a screenshot while it's still one image.
- Save as PNG. It keeps text sharp. JPEG is for photos. More in our screenshot format guide.
Frequently asked questions
How do I put two screenshots side by side on Windows?
Can Snipping Tool combine two screenshots?
How do I combine screenshots vertically, one under the other?
Will combining screenshots reduce the quality?
Is it safe to merge screenshots with an online tool?
Sleekshot Team
We build Sleekshot, a free screenshot and screen recording app for Windows and Mac. Every guide is checked on current Windows 11, Windows 10 and macOS builds.
Also available in: Русский