How to Take a Screenshot With a Mouse on Windows
 By Sleekshot Team
6 min read
By Sleekshot Team
6 min read
Short answer
To take a screenshot with only the mouse, open Start, click Snipping Tool, click New and drag over the area. Pin the app to the taskbar so it's one click away. Faster options are a mouse button or a touchpad tap set to Win + Shift + S. A screenshot app like Sleekshot also starts a screenshot when you click its tray icon.
On this page
- Ways to take a screenshot with the mouse, compared
- Method 1: Snipping Tool from the Start menu
- Method 2: A desktop shortcut that opens the Snipping Tool bar
- Method 3: Click PrtScn on the On-Screen Keyboard
- Method 4: Put screenshots on a mouse button, touchpad or pen
- Method 5: Click the Sleekshot tray icon
- Which method is right for you?
Open the Start menu, click Snipping Tool, click New and drag over the part of the screen you want. That's a full screenshot with nothing but the mouse, and it works on Windows 11 and 10. If you take screenshots often, a few minutes of setup gets it down to a single click: a pinned shortcut, a mouse button, a touchpad tap or a tray icon. They're all below.
Note: Want a screenshot that shows the mouse pointer? That's a different thing. See how to take a screenshot with the cursor.
Ways to take a screenshot with the mouse, compared
| Method | How you start it | One-time setup | Where the image goes |
|---|---|---|---|
| Snipping Tool from Start | Start → Snipping Tool → New | None (pin it for one click) | Clipboard + Pictures\Screenshots (Windows 11) |
| Desktop shortcut to the Snipping Tool bar | Double-click a desktop shortcut | Create the shortcut once | Clipboard |
| Screen snip button (Windows 10) | Action Center → Screen snip | None | Clipboard |
| On-Screen Keyboard | Click PrtScn | Turn on the keyboard | Same as the PrtSc key |
| Mouse button, touchpad or pen | Press the button or tap | Set it to Win + Shift + S | Clipboard |
| Sleekshot | Click the tray icon | Install the app | Clipboard, file or share link |
Method 1: Snipping Tool from the Start menu
Snipping Tool comes with Windows, and you can use it with just the mouse.
- Click Start and find Snipping Tool in the app list.
- In the Snipping Tool window, pick a mode from the list (Rectangle, Window, Full screen or Freeform) and, if you need one, a delay.
- Click New. The screen dims.
- Drag over the area, or click the window you want.
- The snip opens in the editor. Click the Save icon to save a file, or Copy to put it on the clipboard. To paste it somewhere, right-click and choose Paste.
To make it faster, right-click Snipping Tool in the Start menu and choose Pin to taskbar. Then it's one click to open the app and one click on New. The delay is handy with a mouse too: set 3 or 5 seconds, click New, then open the menu you want to screenshot. On Windows 11, every snip is also saved to Pictures\Screenshots. Our guide on where screenshots go lists all the folders.
Method 2: A desktop shortcut that opens the Snipping Tool bar
The Snipping Tool bar, the one Win + Shift + S opens, can also start from a shortcut. That skips the app window.
- Right-click an empty spot on the desktop → New → Shortcut.
- In the location box, type
explorer.exe ms-screenclip:and click Next. This is the only time you need the keyboard, and the On-Screen Keyboard works too. - Name it "Screenshot" and click Finish.
- Double-click the new icon whenever you need a screenshot. The screen dims, you pick a mode on the bar and drag.
If you'd rather start it from the Start menu, right-click the shortcut and choose Pin to Start. On Windows 10, there's an even simpler way. Click the Action Center icon at the right end of the taskbar and click the Screen snip button. If you don't see it, expand the quick actions.
Method 3: Click PrtScn on the On-Screen Keyboard
The Windows On-Screen Keyboard has a PrtScn key you can click, and it does exactly what the real key does.
- Open Settings → Accessibility → Keyboard and turn on On-Screen Keyboard (on Windows 10: Settings → Ease of Access → Keyboard).
- Click PrtScn. To grab only the active window, click Alt first, then PrtScn.
- On current Windows 11 builds, this opens the Snipping Tool bar. On Windows 10, it copies the whole screen to the clipboard.
It's slower than the other methods, but useful when the real keyboard is broken or missing. More options without a keyboard are in our guide on taking a screenshot without Print Screen.
Method 4: Put screenshots on a mouse button, touchpad or pen
If you take screenshots several times a day, put the shortcut on something your hand is already on.
Mouse side buttons. Most mice with extra buttons come with an app, like Logitech Options+, Razer Synapse or Microsoft Mouse and Keyboard Center. Pick a button, choose the option that sends a keystroke or keyboard shortcut and record Win + Shift + S. If you use a screenshot app with its own shortcut, record that key instead.
Laptop touchpad. On Windows 11 laptops with a precision touchpad, open Settings → Bluetooth & devices → Touchpad → Advanced gestures. For a three- or four-finger tap, choose Custom shortcut and record Win + Shift + S. A four-finger tap works well, because it's hard to do by accident.
Pen. On Windows 11, the pen menu includes Snipping Tool by default. Many pens also have a shortcut button. On the Surface Pen, double-clicking the top button opens screen snipping by default. You can change what the button does in Settings → Bluetooth & devices → Pen & Windows Ink.
Method 5: Click the Sleekshot tray icon
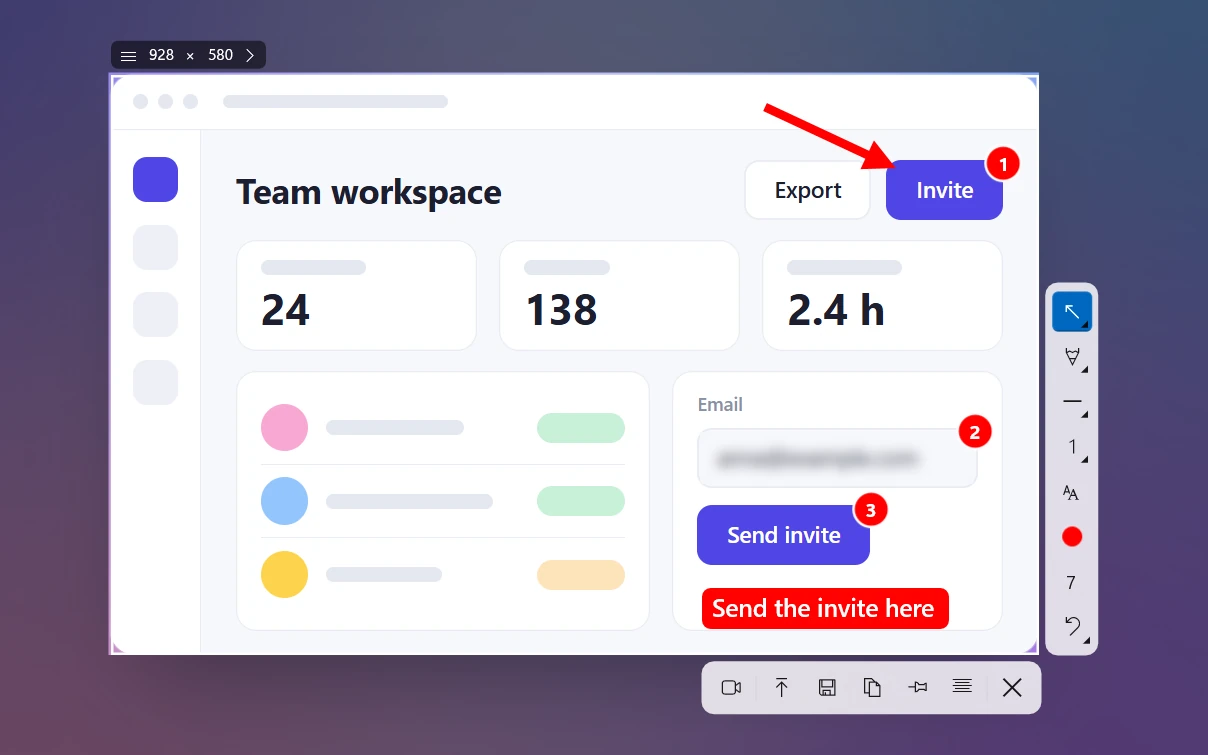
Sleekshot is our free screenshot app for Windows 10 and 11, and everything in it works fine without a keyboard: taking the screenshot, adding arrows and text and sending it. Once it's installed, it lives in the system tray.
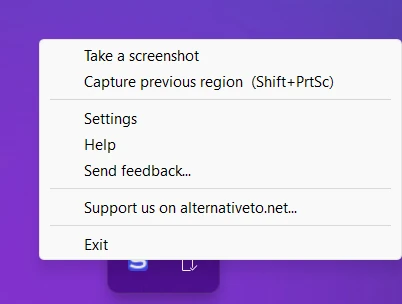
- Left-click the Sleekshot icon in the tray, and the screen dims. Or right-click it and choose Take a screenshot.
- Drag over an area, or click a window to grab it. The tip on screen also mentions Ctrl + A for the full screen, but you don't need it: just drag across the whole screen.
- Add arrows and text with the mouse. Pick a tool on the toolbar next to the selection: arrows, numbered steps, blur, highlighter, text, shapes. Turn the mouse wheel to change the brush or font size.
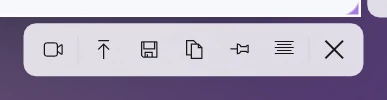
- Finish with the buttons under the selection: Upload for a short link, Save, Copy, Copy text (OCR) or switch to the screen recorder. Each one is a button.
Two tips. If the icon is hidden behind the ^ arrow, drag it onto the taskbar so it's always one click away. And keep the option to start with Windows on (Settings → Common), so the icon is there after every restart. You can record video the same way: select an area, click the screen recorder button, then Record. What Sleekshot doesn't have: a delay or scrolling screenshots. See all the tools for arrows, steps and blur.
Which method is right for you?
For the occasional screenshot, Snipping Tool pinned to the taskbar is enough. On a laptop, a four-finger tap set to Win + Shift + S feels the most natural, since your hand is already on the touchpad. At a desk with a multi-button mouse, a side button does the same job. And if you also add arrows to your screenshots and share them, a tray app like Sleekshot saves the most clicks. If you prefer the keyboard, every shortcut is in our Snipping Tool shortcut guide.
Frequently asked questions
Can I take a screenshot using only the mouse?
How do I make a mouse button take a screenshot?
How do I take a screenshot with the touchpad on a laptop?
Where do screenshots taken with the mouse go?
How do I take a screenshot with the mouse on a Mac?
Sleekshot Team
We build Sleekshot, a free screenshot and screen recording app for Windows and Mac. Every guide is checked on current Windows 11, Windows 10 and macOS builds.
Also available in: Русский