How to Take a High-Quality Screenshot (Sharp, Not Blurry)
 By Sleekshot Team
7 min read
By Sleekshot Team
7 min read
Short answer
A screenshot is only as sharp as the pixels on your screen. Use the display's native resolution, and zoom in (Ctrl + plus, or 150–200% scaling) before you screenshot small text. Save as PNG and never enlarge the image afterwards. Most blurry screenshots come from JPEG compression, resizing in a document, or a chat app compressing the image again. Send the screenshot as a file or a link instead.
On this page
- Why screenshots look blurry: quick diagnosis
- Step 1: Use native resolution and understand display scaling
- Step 2: Zoom in before you screenshot small details
- Step 3: Take only the area you need, at an exact size
- Step 4: Save as PNG, not JPEG
- Step 5: Don't enlarge screenshots afterwards
- Step 6: Share without compression
- Tools that keep screenshots sharp
- Checklist for a sharp screenshot
To take a high-quality screenshot, use your screen's native resolution and zoom in on small details before you press the shortcut. Save as PNG, and don't enlarge the image afterwards. A screenshot copies your screen's pixels one to one, so it can't be sharper than what you see. But it gets blurry very easily on its way to the reader. JPEG compression, resizing in Word and chat apps that compress photos again cause most "blurry screenshot" complaints.
Why screenshots look blurry: quick diagnosis
Find your symptom first. Each fix is explained below. In our experience, the screenshot itself is rarely the problem. What happens to it afterwards usually is.
| Symptom | Likely cause | Fix |
|---|---|---|
| Fuzzy text that also looks fuzzy on screen | An older app stretched by Windows display scaling | Let Windows fix app scaling, or change the app's high-DPI setting |
| Sharp file, blurry after sending | The chat app compressed it again | Send it as a file or document, or share a link |
| Blocky smudges around letters | JPEG compression | Save as PNG |
| Blurry after pasting into Word or PowerPoint | Office compressed or stretched it | Turn off image compression, insert at 100% or 50% |
| Jagged, pixelated edges | The screenshot was enlarged | Zoom in and take it again instead of enlarging |
| Tiny, unreadable text | Full-screen screenshot shown at a small size | Take only the area you need |
| Wavy lines, glare | Someone took a photo of the screen | Use a real screenshot tool |
Step 1: Use native resolution and understand display scaling
A screenshot has exactly as many pixels as the area of the screen you select. On a 1920 × 1080 monitor, a full-screen screenshot is 1920 × 1080. On a 4K monitor, it's 3840 × 2160, even with Windows display scaling at 150% or 200%. Scaling makes buttons and text bigger, so each letter is drawn with more pixels. That's exactly why screenshots from high-DPI screens look sharp.
Check two things in Settings → System → Display:
- Display resolution should be the value marked (Recommended). At a lower resolution, Windows stretches the whole screen, and every screenshot along with it.
- Scale: higher scaling gives sharper text in screenshots, but bigger files. For documentation people will read on laptops and phones, 150–200% is a good setting while you take screenshots.
If one app looks blurry on screen, its screenshot will too. Windows stretches older programs that weren't built for high-DPI screens. Open Settings → System → Display → Scale and turn on the option that lets Windows fix apps so they're not blurry (it's called Fix scaling for apps on recent builds). If that doesn't help, right-click the program's shortcut → Properties → Compatibility → Change high DPI settings, and override the scaling so the app handles it.
On a Mac with a Retina display, screenshots are saved at twice the resolution the screen seems to use. A full-screen screenshot is about twice as wide and tall as the "looks like" size in Display settings. That's great for sharpness. Just remember the files are big.
Step 2: Zoom in before you screenshot small details
The most effective trick for sharp screenshots is to make the content bigger before you take them, so every letter gets more pixels.
- Browser or app: press Ctrl + + (or Ctrl + mouse wheel) to zoom to 150–200%. Take the screenshot, then press Ctrl + 0 to reset. Shown at half size in a document, the image looks razor-sharp on high-DPI screens.
- Web pages bigger than your monitor (Chrome and Edge): press F12, then Ctrl + Shift + M for the device toolbar. In its ⋮ menu, choose Add device pixel ratio and set DPR to 2 or 3. Then pick Capture screenshot or Capture full size screenshot from the same menu.
- Firefox: open the Web Console (Ctrl + Shift + K) and run
:screenshot --dpr 2. Add--fullpageto get the whole page.
Zooming doesn't help with a photo or video frame that's already low-resolution. A screenshot can't have more detail than the screen showed.
Step 3: Take only the area you need, at an exact size
A tight area is easier to read than a full-screen screenshot that gets shrunk to fit a page or a chat bubble. Select just the dialog box, panel or paragraph you're talking about.
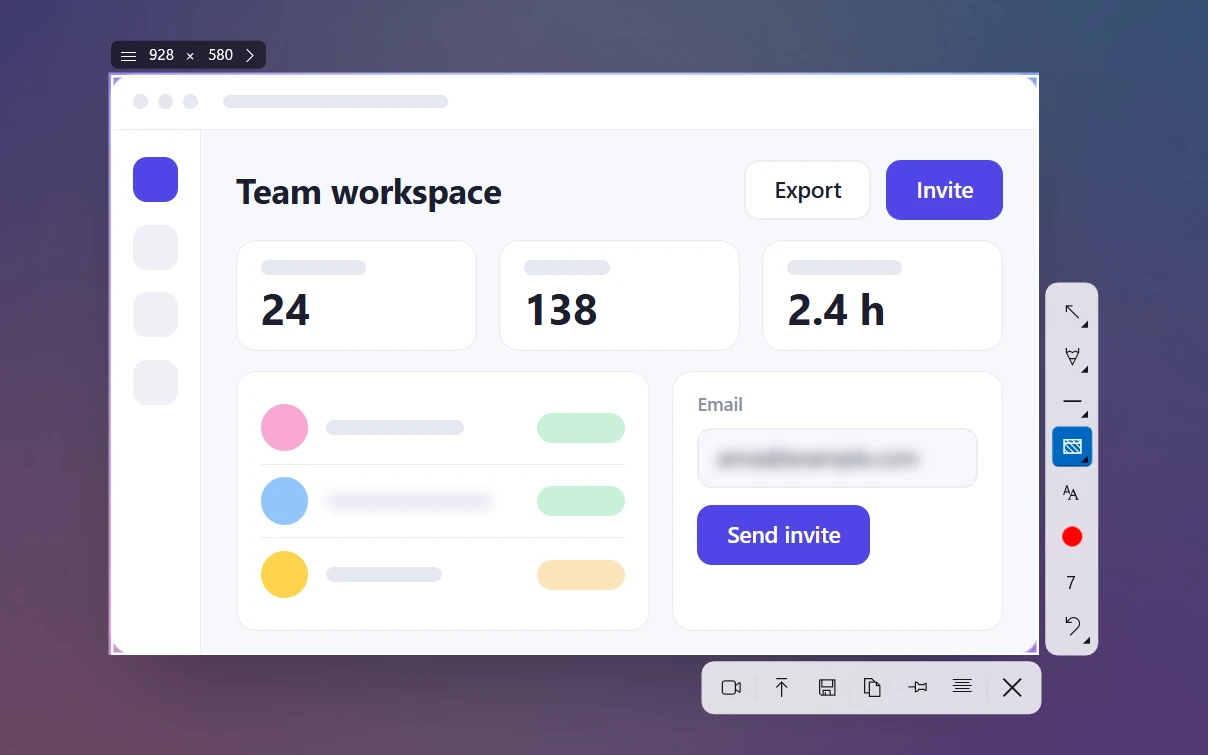
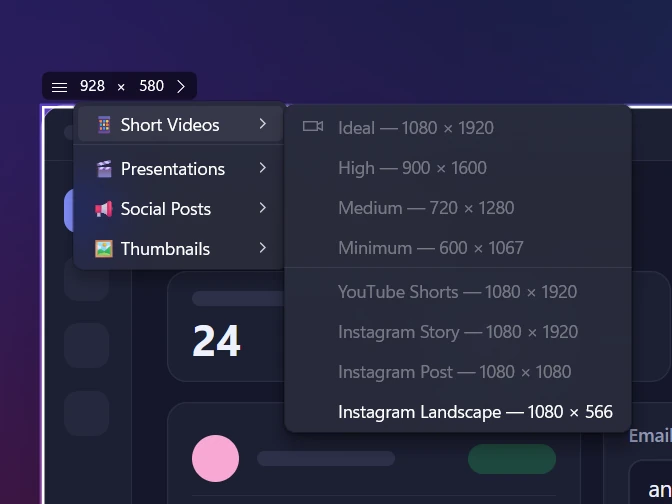
Does the image need a set size, like a blog header, a YouTube thumbnail or a slide? Take it at that size instead of resizing later. In Sleekshot, you can type into the W × H size box next to the selection (up to 7680 × 4320). Its menu has ready-made sizes for short videos, presentations, social posts and thumbnails: YouTube 1280 × 720, Open Graph 1200 × 630, Full HD, 4K and more.
Need the right numbers for each social network? Our social media image sizes guide lists them.
Step 4: Save as PNG, not JPEG
PNG is lossless. Every pixel of text and every button edge is stored exactly. JPEG throws away detail in 8 × 8 pixel blocks, which leaves smudges around letters and thin lines. That's fine for photos and bad for screenshots. WebP can go either way, depending on how it's saved.
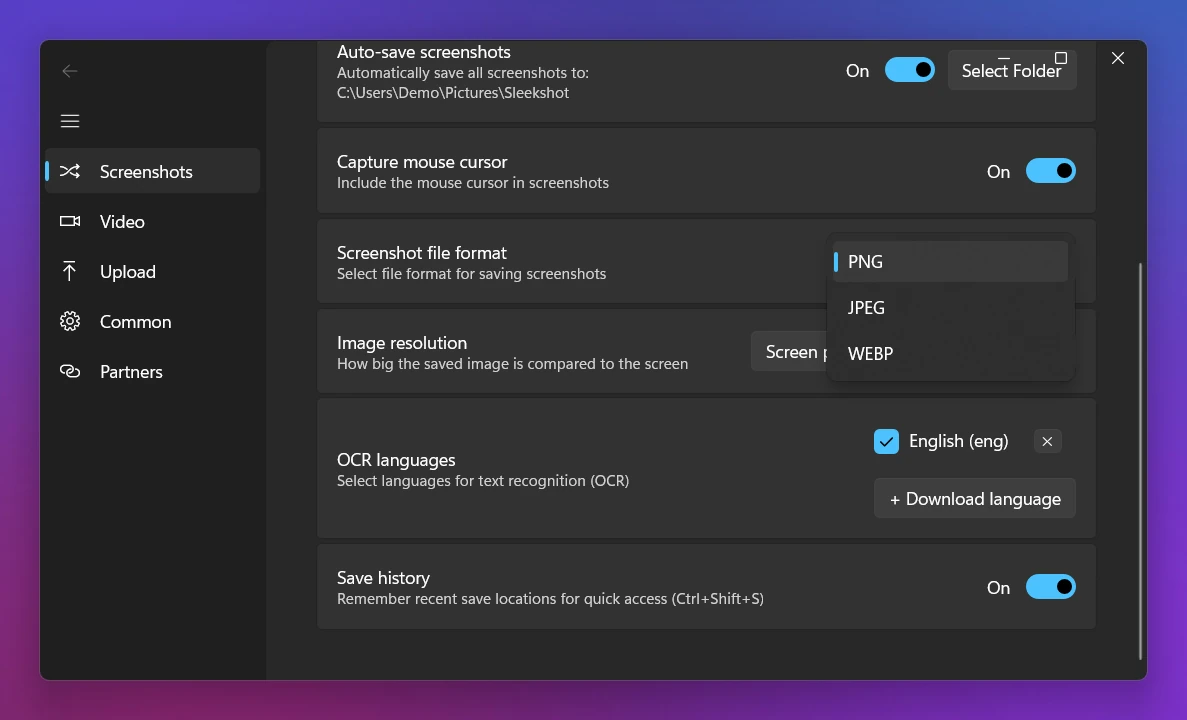
The good news: Windows (Win + PrtSc and Snipping Tool's auto-save) and macOS save screenshots as PNG by default. In Sleekshot, you set the format in Settings → Screenshots → Screenshot file format (PNG, JPEG or WebP). PNG is the default.
When does JPEG make sense? For a screenshot of a photo or a game that has to fit an upload limit. Our PNG vs JPG vs WebP guide compares the formats in detail.
Step 5: Don't enlarge screenshots afterwards
When you enlarge an image, the editor has to make up pixels, and the text turns soft. Shrinking is safer, especially by an even amount like 50%, which keeps edges clean.
- Word, PowerPoint, Excel: go to File → Options → Advanced → Image Size and Quality. Check Do not compress images in file and set Default resolution to High fidelity. Then insert the screenshot without dragging it bigger than its original size.
- Slides and docs: if a screenshot is too small to read, take it again with more zoom (Step 2) instead of stretching it.
- Paint or Photos: use them for cropping, not for making images bigger.
Step 6: Share without compression
Chat apps shrink images you send as photos and compress them again to save data. The result looks noticeably softer than your original.
- WhatsApp: the HD option sends a bigger copy, but it's still compressed. Attach the screenshot as a document to send the original file.
- Telegram Desktop: turn off image compression in the send window, or send the screenshot as a file. More tips in our Telegram screenshots guide.
- Any app: share a link instead of an attachment. In Sleekshot, Ctrl + U uploads the screenshot and gives you a short link, so the chat app has no image to compress.
Tools that keep screenshots sharp
Any real screenshot tool takes pixel-perfect images. The differences are in the format, exact sizing and how many steps it takes before you can share.
| Tool | Default format | Exact pixel size | Notes |
|---|---|---|---|
| Win + PrtSc | PNG | Full screen only | Saved to Pictures\Screenshots |
| Snipping Tool (Windows 11) | PNG | No, you drag the area by hand | Can save JPG when you save manually |
| macOS (⌘ ⇧ 4) | PNG | No | Retina screenshots are 2× the size the screen seems to use |
| Sleekshot (Windows) | PNG (JPEG, WebP optional) | Yes, type W × H or pick a ready-made size | Add arrows, copy, save or get a link in one place |
Sleekshot is free for Windows 10 and 11, with no account and no watermark. It doesn't take scrolling screenshots, so for a full web page, use the browser methods from Step 2.
Checklist for a sharp screenshot
- Native resolution, with scaling at 150–200% for small text.
- Zoom in on the content before you take the screenshot.
- Take a tight area at the size you need.
- Save as PNG.
- Never enlarge. Shrink only if you have to.
- Send it as a file or a link, not as a compressed photo.
For other things that make screenshots hard to read, like cluttered desktops, cut-off menus and missing context, see common screenshot mistakes.
Frequently asked questions
Why are my screenshots blurry?
How do I take a screenshot with a higher resolution than my screen?
Is PNG or JPEG better for screenshot quality?
What resolution is a screenshot?
Why do screenshots look worse after sending them in WhatsApp or Telegram?
How do I keep screenshots sharp in Word or PowerPoint?
Sleekshot Team
We build Sleekshot, a free screenshot and screen recording app for Windows and Mac. Every guide is checked on current Windows 11, Windows 10 and macOS builds.
Also available in: Русский